Difference between revisions of "Doctor Who (Fine Art Castings)"
Cattwister (talk | contribs) m (→The Doctors) |
Cattwister (talk | contribs) (→Companions) |
||
| (4 intermediate revisions by the same user not shown) | |||
| Line 27: | Line 27: | ||
====The Doctors==== | ====The Doctors==== | ||
<gallery> | <gallery> | ||
| − | Image:FineArtCastings-DW40-Doctor1.jpg|<center>William Hartnell | + | Image:FineArtCastings-DW40-Doctor1-p1.jpg|<center>William Hartnell |
Image:FineArtCastings-DW40-Doctor2.jpg|<center>Patrick Troughton<br><span style="font-size:smaller;">Painted by: [http://www.artwho9figurepainting.co.uk Mark Dixon]</span> | Image:FineArtCastings-DW40-Doctor2.jpg|<center>Patrick Troughton<br><span style="font-size:smaller;">Painted by: [http://www.artwho9figurepainting.co.uk Mark Dixon]</span> | ||
Image:FineArtCastings-DW40-Doctor3.jpg|<center>Jon Pertwee<br><span style="font-size:smaller;">Painted by: [http://www.artwho9figurepainting.co.uk Mark Dixon]</span> | Image:FineArtCastings-DW40-Doctor3.jpg|<center>Jon Pertwee<br><span style="font-size:smaller;">Painted by: [http://www.artwho9figurepainting.co.uk Mark Dixon]</span> | ||
Image:FineArtCastings-DW40-Doctor4.jpg|<center>Tom Baker<br><span style="font-size:smaller;">Painted by: [http://www.artwho9figurepainting.co.uk Mark Dixon]</span> | Image:FineArtCastings-DW40-Doctor4.jpg|<center>Tom Baker<br><span style="font-size:smaller;">Painted by: [http://www.artwho9figurepainting.co.uk Mark Dixon]</span> | ||
Image:FineArtCastings-DW40-Doctor5.jpg|<center>Peter Davison | Image:FineArtCastings-DW40-Doctor5.jpg|<center>Peter Davison | ||
| − | Image:FineArtCastings-DW40-Doctor6.jpg|<center>Colin Baker | + | Image:FineArtCastings-DW40-Doctor6-p1.jpg|<center>Colin Baker |
Image:FineArtCastings-DW40-Tardis.jpg|<center>Tardis | Image:FineArtCastings-DW40-Tardis.jpg|<center>Tardis | ||
</gallery> | </gallery> | ||
| Line 41: | Line 41: | ||
image:FineArtCastings-DW40-Companion2.jpg|<center>Leela | image:FineArtCastings-DW40-Companion2.jpg|<center>Leela | ||
image:FineArtCastings-DW40-Companion3.jpg|<center>Peri | image:FineArtCastings-DW40-Companion3.jpg|<center>Peri | ||
| − | image:FineArtCastings-DW40-Companion4.jpg|<center>Romana II | + | image:FineArtCastings-DW40-Companion4-p1.jpg|<center>Romana II |
image:FineArtCastings-DW40-Companion5.jpg|<center>Sarah Jane Smith | image:FineArtCastings-DW40-Companion5.jpg|<center>Sarah Jane Smith | ||
image:FineArtCastings-DW40-Companion6.jpg|<center>Tegan | image:FineArtCastings-DW40-Companion6.jpg|<center>Tegan | ||
image:FineArtCastings-DW40-Companion7.jpg|<center>Zoe | image:FineArtCastings-DW40-Companion7.jpg|<center>Zoe | ||
image:FineArtCastings-DW40-Companion8.jpg|<center>Jamie | image:FineArtCastings-DW40-Companion8.jpg|<center>Jamie | ||
| − | image:FineArtCastings-DW40-Companion9.jpg|<center>The Brigadier | + | image:FineArtCastings-DW40-Companion9-p1.jpg|<center>The Brigadier |
| − | image:FineArtCastings-DW40-Companion10.jpg|<center>Yates | + | image:FineArtCastings-DW40-Companion10-p1.jpg|<center>Yates |
| − | image:FineArtCastings-DW40-Companion11a.jpg|<center>Unit Troops (4)<br>Trooper 1 | + | image:FineArtCastings-DW40-Companion11a-p1.jpg|<center>Unit Troops (4)<br>Trooper 1 |
| − | image:FineArtCastings-DW40-Companion11b.jpg|<center>Unit Troops (4)<br>Trooper 2 | + | image:FineArtCastings-DW40-Companion11b-p1.jpg|<center>Unit Troops (4)<br>Trooper 2 |
| − | image:FineArtCastings-DW40-Companion11c.jpg|<center>Unit Troops (4)<br>Trooper 3 | + | image:FineArtCastings-DW40-Companion11c-p1.jpg|<center>Unit Troops (4)<br>Trooper 3 |
| − | image:FineArtCastings-DW40-Companion11d.jpg|<center>Unit Troops (4)<br>Trooper 4 | + | image:FineArtCastings-DW40-Companion11d-p1.jpg|<center>Unit Troops (4)<br>Trooper 4 |
image:FineArtCastings-DW40-Companion12.jpg|<center>Turlough | image:FineArtCastings-DW40-Companion12.jpg|<center>Turlough | ||
</gallery> | </gallery> | ||
<br> | <br> | ||
| + | |||
====Enemies==== | ====Enemies==== | ||
<gallery> | <gallery> | ||
| Line 74: | Line 75: | ||
Image:FineArtCastings-DW40-Kiv.jpg|<center>Kiv<br><span style="font-size:smaller;">Painted by: [http://www.artwho9figurepainting.co.uk Mark Dixon]</span> | Image:FineArtCastings-DW40-Kiv.jpg|<center>Kiv<br><span style="font-size:smaller;">Painted by: [http://www.artwho9figurepainting.co.uk Mark Dixon]</span> | ||
Image:FineArtCastings-DW40-TheMaster.jpg|<center>The Master<br><span style="font-size:smaller;">Painted by: [http://www.artwho9figurepainting.co.uk Mark Dixon]</span> | Image:FineArtCastings-DW40-TheMaster.jpg|<center>The Master<br><span style="font-size:smaller;">Painted by: [http://www.artwho9figurepainting.co.uk Mark Dixon]</span> | ||
| − | image:FineArtCastings-DW40-Mummy.jpg|<center>Mummy | + | image:FineArtCastings-DW40-Mummy-p1.jpg|<center>Mummy |
Image:FineArtCastings-DW40-RastonRobot.jpg|<center>Raston Robot<br><span style="font-size:smaller;">Painted by: [http://www.artwho9figurepainting.co.uk Mark Dixon]</span> | Image:FineArtCastings-DW40-RastonRobot.jpg|<center>Raston Robot<br><span style="font-size:smaller;">Painted by: [http://www.artwho9figurepainting.co.uk Mark Dixon]</span> | ||
| − | image:FineArtCastings-DW40-RobotOfDeath.jpg|<center>Robot of Death Super Voc | + | image:FineArtCastings-DW40-RobotOfDeath-blister.jpg|<center>Robot of Death<br>Super Voc |
| + | image:FineArtCastings-DW40-RobotOfDeath-p1.jpg|<center>Robot of Death<br>Super Voc | ||
image:FineArtCastings-DW40-SeaDevil1.jpg|<center>Sea Devil | image:FineArtCastings-DW40-SeaDevil1.jpg|<center>Sea Devil | ||
image:FineArtCastings-DW40-SeaDevil2.jpg|<center>Sea Devil (Davison version) | image:FineArtCastings-DW40-SeaDevil2.jpg|<center>Sea Devil (Davison version) | ||
| Line 83: | Line 85: | ||
image:FineArtCastings-DW40-Sil.jpg|<center>Sil | image:FineArtCastings-DW40-Sil.jpg|<center>Sil | ||
image:FineArtCastings-DW40-Silurian.jpg|<center>Silurian | image:FineArtCastings-DW40-Silurian.jpg|<center>Silurian | ||
| − | Image:FineArtCastings-DW40-Sontaran5.jpg|<center>Sontaran | + | Image:FineArtCastings-DW40-Sontaran5-blister.jpg|<center>Sontaran |
Image:FineArtCastings-DW40-Sontaran6.jpg|<center>Sontaran | Image:FineArtCastings-DW40-Sontaran6.jpg|<center>Sontaran | ||
Image:FineArtCastings-DW40-Sontaran4.jpg|<center>Sontaran | Image:FineArtCastings-DW40-Sontaran4.jpg|<center>Sontaran | ||
Revision as of 20:45, 16 July 2016
![]()
About
Doctor Who (25mm)
Enemies

Cyberman (Earthshock)
Painted by: Mark Dixon
Cyberman (Earthshock)
Painted by: Mark Dixon
Cyberman (Earthshock)
Painted by: Mark Dixon
Dalek 
Sontaran 
Sontaran
Painted by: Mark Dixon
Sontaran
Painted by: Mark Dixon
Sontaran
Painted by: Mark Dixon


- It is a working assumption that the 6 Sontaran poses are consistent across the 3 scales.
Doctor Who (40mm)
The Doctors

William Hartnell 
Patrick Troughton
Painted by: Mark Dixon
Jon Pertwee
Painted by: Mark Dixon
Tom Baker
Painted by: Mark Dixon
Peter Davison 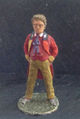
Colin Baker - FineArtCastings-DW40-Tardis.jpg
Tardis


Companions
- FineArtCastings-DW40-Companion1.jpg
K-9 
Leela - FineArtCastings-DW40-Companion3.jpg
Peri 
Romana II - FineArtCastings-DW40-Companion5.jpg
Sarah Jane Smith - FineArtCastings-DW40-Companion6.jpg
Tegan - FineArtCastings-DW40-Companion7.jpg
Zoe - FineArtCastings-DW40-Companion8.jpg
Jamie 
The Brigadier 
Yates 
Unit Troops (4)
Trooper 1
Unit Troops (4)
Trooper 2
Unit Troops (4)
Trooper 3
Unit Troops (4)
Trooper 4
Turlough


Enemies
- FineArtCastings-DW40-Azal.jpg
Azal - FineArtCastings-DW40-Boc.jpg
Boc - FineArtCastings-DW40-Borad.jpg
Borad the Half-human mutant 
Cyberleader (Earthshock)
Painted by: Mark Dixon
Cyberman (Earthshock)
Painted by: Mark Dixon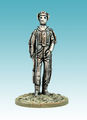
Cyberman (Moonbase)
Painted by: Mark Dixon
Cyberman, decapitated (Earthshock)
Painted by: Mark Dixon
Cyberman, wounded (Earthshock)
Painted by: Mark Dixon
Cyberman, wounded, kneeling (Earthshock)
Painted by: Mark Dixon
Damaged Dalek
Painted by: Mark Dixon- FineArtCastings-DW40-Davros.jpg
Davros - FineArtCastings-DW40-Draconian.jpg
Draconian - FineArtCastings-DW40-Drathro.jpg
Drathro 
Ice Warrior
Painted by: Mark Dixon
Inquisitor
Painted by: Mark Dixon
Kiv
Painted by: Mark Dixon
The Master
Painted by: Mark Dixon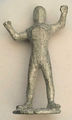
Mummy 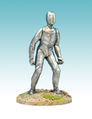
Raston Robot
Painted by: Mark Dixon
Robot of Death
Super Voc
Robot of Death
Super Voc- FineArtCastings-DW40-SeaDevil1.jpg
Sea Devil 
Sea Devil (Davison version) 
Sensorite
Painted by: Mark Dixon- FineArtCastings-DW40-ServiceRobot.jpg
Service Robot - FineArtCastings-DW40-Sil.jpg
Sil 
Silurian 
Sontaran - FineArtCastings-DW40-Sontaran6.jpg
Sontaran - FineArtCastings-DW40-Sontaran4.jpg
Sontaran 
Sontaran (Helmeted version)
Painted by: Mark Dixon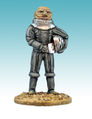
Sontaran
Painted by: Mark Dixon
Sontaran (Helmeted version)
Painted by: Mark Dixon- FineArtCastings-DW40-Toymaker.jpg
Toymaker 
Yeti
Painted by: Mark Dixon
Zygon
Painted by: Mark Dixon


- It is possible that the 6 different Sontarans exist as both helmeted & unhelmeted versions.
- It is a working assumption that the 6 Sontaran poses are consistent across the 3 scales.
Doctor Who (80mm)
The Doctors

William Hartnell 
Patrick Troughton
80mm
Painted by: Mark Dixon
Jon Pertwee
80mm
Painted by: Mark Dixon
Tom Baker 
Peter Davison 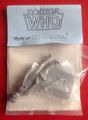
Colin Baker 
Tardis


Companions

K-9 - FineArtCastings-DW80-Companion2.jpg
Leela 
Peri 
Romana II 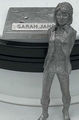
Sarah Jane Smith 
Tegan 
Zoe - FineArtCastings-DW80-Companion8.jpg
Jamie 
The Brigadier - FineArtCastings-DW80-Companion10.jpg
Yates - FineArtCastings-DW80-Companion11a.jpg
Unit Troops (4)
Trooper 1 - FineArtCastings-DW80-Companion11b.jpg
Unit Troops (4)
Trooper 2 - FineArtCastings-DW80-Companion11c.jpg
Unit Troops (4)
Trooper 3 - FineArtCastings-DW80-Companion11d.jpg
Unit Troops (4)
Trooper 4 - FineArtCastings-DW80-Companion12.jpg
Turlough


Enemies

Azal - FineArtCastings-DW80-Boc.jpg
Boc 
Borad the Half-human mutant 
Mk3 Cyberman
Painted by: Mark Dixon
Earthshock Cyberman
Painted by: Mark Dixon
Cyberman - FineArtCastings-DW80-Cyberman4.jpg
Cyberman - FineArtCastings-DW80-Cyberman5.jpg
Cyberman - FineArtCastings-DW80-Cyberman6.jpg
Cyberman 
Dalek 
Davros 
Draconian
Painted by: Mark Dixon- FineArtCastings-DW80-Drathro.jpg
Drathro 
Ice Warrior
Painted by: Mark Dixon- FineArtCastings-DW80-Inquisitor.jpg
Inquisitor - FineArtCastings-DW80-Kiv.jpg
Kiv 
The Master - FineArtCastings-DW80-Mummy.jpg
Mummy - FineArtCastings-DW80-RastonRobot.jpg
Raston Robot 
Robot of Death Super Voc 
Sea Devil
Painted by: Mark Dixon- FineArtCastings-DW80-SeaDevil2.jpg
Sea Devil (Davison-era) - FineArtCastings-DW80-Sensorite.jpg
Sensorite - FineArtCastings-DW80-ServiceRobot.jpg
Service Robot 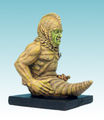
Sil
Painted by: Mark Dixon
Silurian 
Sontaran
Painted by: Mark Dixon
Sontaran - FineArtCastings-DW80-Sontaran3.jpg
Sontaran - FineArtCastings-DW80-Sontaran4.jpg
Sontaran - FineArtCastings-DW80-Sontaran5.jpg
Sontaran - FineArtCastings-DW80-Sontaran6.jpg
Sontaran 
Toymaker - FineArtCastings-DW80-Yeti.jpg
Yeti 
Zygon
80mm
Painted by: Mark Dixon


- It is possible that the 6 different Sontarans exist as both helmeted & unhelmeted versions.
- It is a working assumption that the 6 Sontaran poses are consistent across the 3 scales.
References
- [1], www.richardwho.com, Steven Smith's "Fine Art Castings Collection" (retrieved 2016-01-03)
- [2], LMW Doctor Who Overview Page