Difference between revisions of "Fantasy Tribes"
Cattwister (talk | contribs) m (→Fantasy Tribe Orcs<span id="FTO"/>) |
Cattwister (talk | contribs) m (→FTF Advert 1982<span id="FTF-82"/>) |
||
| (37 intermediate revisions by 2 users not shown) | |||
| Line 1: | Line 1: | ||
<div class="navwidth"> | <div class="navwidth"> | ||
| − | {{ | + | |
| − | + | {{ArticleLogoMenu||citadellogo.jpg|Citadel Miniatures|125px|__TOC__|QM-Citadel}} | |
| − | + | ||
| + | [[Citadel Miniatures|Citadel's]] [[Fantasy Tribes]] series had a wide range of figure ''variations'' with many models having only slight modifications to a basic pose. Most of the known variations are uncatalogued but most of them can be viewed at CCM [[#References|[6]]], as well as here. The [[Fantasy Tribes]] range was listed with a few pictures in Citadel catalogues ''prior'' to the 1983 Dragon Catalogue. In that catalogue a few ''Fantasy Tribe'' figures were carried over into the new 'C' Series codes. All of those models, though, were quickly retired and the ''Fantasy Tribes'' era was effectively over. However, the range was also manufactured under licence by [[Ral Partha]] (USA) and [[RAFM]] (Canada) and figures from this series are pictured in early 1980s catalogues from both companies. | ||
| + | |||
| + | {{clear}} | ||
<br> | <br> | ||
| − | |||
===Fantasy Tribe Dragons<span id="DRG"/>=== | ===Fantasy Tribe Dragons<span id="DRG"/>=== | ||
<gallery> | <gallery> | ||
image:Citadel-DRG1.jpg|<center>DRG1<br>Red Dragon | image:Citadel-DRG1.jpg|<center>DRG1<br>Red Dragon | ||
| − | image:Citadel-DRG2.jpg|<center>DRG2<br>Green Dragon | + | image:Citadel-DRG2-03.jpg|<center>DRG2<br>Green Dragon<br>{{smg|(parts)}} |
image:Citadel-DRG3.jpg|<center>DRG3<br>Ice Dragon | image:Citadel-DRG3.jpg|<center>DRG3<br>Ice Dragon | ||
| − | image:Citadel-DRG4.jpg|<center>DRG4<br>Golden Dragon | + | image:Citadel-DRG4-parts.jpg|<center>DRG4<br>Golden Dragon<br>{{smg|(parts)}} |
image:Citadel-DRG-head-01.jpg|<center>Heads{{Gallery-Ribbon}} | image:Citadel-DRG-head-01.jpg|<center>Heads{{Gallery-Ribbon}} | ||
image:Citadel-DRG-wing-01.jpg|<center>Wings{{Gallery-Ribbon}} | image:Citadel-DRG-wing-01.jpg|<center>Wings{{Gallery-Ribbon}} | ||
| Line 46: | Line 48: | ||
image:Citadel-FTD20.jpg|<center>FTD20<br>Dwarf Champion in Plate Armour w. Two-Handed Sword | image:Citadel-FTD20.jpg|<center>FTD20<br>Dwarf Champion in Plate Armour w. Two-Handed Sword | ||
</gallery> | </gallery> | ||
| − | * FTD1 to FTD16 are listed in the Citadel Catalogs | + | * FTD1 to FTD16 are listed in the Citadel Catalogs |
| − | * FTD17 to FTD20 are listed in Ral Partha 1984 Imports Catalog [[#References|[4]]] | + | * FTD17 to FTD20 are listed in Ral Partha 1984 Imports Catalog [[#References|[4]]] |
| − | * FTD21 to FTD26 (and an alternative FTD11) were released by ''Ral Partha'': see [[Fantasy Tribe Dwarves]] | + | * FTD21 to FTD26 (and an alternative FTD11) were released by ''Ral Partha'': see [[Fantasy Tribe Dwarves]] |
| − | * Figures with variations: FTD1,FTD2,FTD3,FTD4,FTD5,FTD6,FTD7,FTD8,FTD9,FTD10 | + | * Figures with variations: FTD1,FTD2,FTD3,FTD4,FTD5,FTD6,FTD7,FTD8,FTD9,FTD10 |
| − | * Some of these figures were reused in the C07 & C08 ''Dwarf Warriors'' | + | * Some of these figures were reused in the C07 & C08 ''Dwarf Warriors'' |
| + | * In 1987, a few variants were re-issued briefly as seen on the ''"Original Dwarfs Flyer"'' [[#References|[12]]]. | ||
<br> | <br> | ||
| Line 58: | Line 61: | ||
However, there was also a large, 1-page advert [[#References|[11]]] that showed sketches of ''119'' (!) FTF figures. This shows the bulk of the range including some but not all from the North American listings. Most of the range would end up in the new [[C01 Fighters (Citadel)|C01 Fighters]] series in late 1983 where they kept to the same (official) FTF categories.<br> | However, there was also a large, 1-page advert [[#References|[11]]] that showed sketches of ''119'' (!) FTF figures. This shows the bulk of the range including some but not all from the North American listings. Most of the range would end up in the new [[C01 Fighters (Citadel)|C01 Fighters]] series in late 1983 where they kept to the same (official) FTF categories.<br> | ||
<br> | <br> | ||
| − | '''Note''': figures in the | + | '''Note''': figures in the [[Ral Partha]] version of the [[Fantasy Tribe Fighters]] series were redesigned after Partha and Citadel parted company.<br> |
<br> | <br> | ||
| Line 78: | Line 81: | ||
image:Citadel-FTF-22.jpg|<center>FTF-22<br>Paladin w. Hand Axe<br>{{smg|([[#FTF-82|82 008]])}} | image:Citadel-FTF-22.jpg|<center>FTF-22<br>Paladin w. Hand Axe<br>{{smg|([[#FTF-82|82 008]])}} | ||
image:Citadel-FTF-23.jpg|<center>FTF-23<br>Paladin w. Full Gear Pack<br>{{smg|([[#FTF-82|82 011]])}} | image:Citadel-FTF-23.jpg|<center>FTF-23<br>Paladin w. Full Gear Pack<br>{{smg|([[#FTF-82|82 011]])}} | ||
| − | image:Citadel-FTF-045.jpg|<center>FTF-24<br>Rich Paladin<br>{{smg|([[#FTF-82|82 045]])}} | + | image:Citadel-FTF-045.jpg|<center>FTF-24<br>Rich / Royal Paladin<br>{{smg|([[#FTF-82|82 045]])}} |
image:Citadel-C01-01.jpg|<center>FTF-25<br>Paladin on Quest | image:Citadel-C01-01.jpg|<center>FTF-25<br>Paladin on Quest | ||
</gallery> | </gallery> | ||
| Line 98: | Line 101: | ||
image:Citadel-FTF-40.jpg|<center>FTF-40<br>Dragon Knight of Chaos in Plate Armour<br>{{smg|([[#FTF-82|82 080]])}} | image:Citadel-FTF-40.jpg|<center>FTF-40<br>Dragon Knight of Chaos in Plate Armour<br>{{smg|([[#FTF-82|82 080]])}} | ||
image:Citadel-FTF-41.jpg|<center>FTF-41<br>Champion of Chaos w. Sword<br>{{smg|([[#FTF-82|82 043]])}} | image:Citadel-FTF-41.jpg|<center>FTF-41<br>Champion of Chaos w. Sword<br>{{smg|([[#FTF-82|82 043]])}} | ||
| − | image:Citadel-FTF-42.jpg|<center>FTF-42<br>Female Chaos Warrior w. Sword, Shield & Bow<br>{{smg|([[#FTF-82|82 096]])}} | + | image:Citadel-FTF-42-02.jpg|<center>FTF-42<br>Female Chaos Warrior w. Sword, Shield & Bow<br>{{smg|([[#FTF-82|82 096]])}} |
image:Citadel-FTF43.jpg|<center>FTF-43<br>Captain of Chaos w. Mace<br>{{smg|([[#FTF-82|82 112]])}} | image:Citadel-FTF43.jpg|<center>FTF-43<br>Captain of Chaos w. Mace<br>{{smg|([[#FTF-82|82 112]])}} | ||
image:Citadel-FTF44.jpg|<center>FTF-44<br>Chaotic Adventurer w. Sword & Gauntlet Knife<br>{{smg|([[#FTF-82|82 038]])}} | image:Citadel-FTF44.jpg|<center>FTF-44<br>Chaotic Adventurer w. Sword & Gauntlet Knife<br>{{smg|([[#FTF-82|82 038]])}} | ||
| Line 115: | Line 118: | ||
image:Citadel-FTF-55.jpg|<center>FTF-55<br>Truk the Well Provided<br>{{smg|([[#FTF-82|82 110]])}} | image:Citadel-FTF-55.jpg|<center>FTF-55<br>Truk the Well Provided<br>{{smg|([[#FTF-82|82 110]])}} | ||
image:Ctadel-FTF-56.jpg|<center>FTF-56<br>Adventurer Prince Ardelon Lonestar | image:Ctadel-FTF-56.jpg|<center>FTF-56<br>Adventurer Prince Ardelon Lonestar | ||
| − | image:Citadel- | + | image:Citadel-C01-2C-07.jpg|<center>FTF-57<br>Heavy Equipped Adventurer w. Crossbow |
| − | image:Citadel- | + | image:Citadel-C01-2C-12.jpg|<center>FTF-58<br>Knightly Adventurer w. Mail & Shield |
| − | image:Citadel- | + | image:Citadel-C01-2C-09.jpg|<center>FTF-59<br>Adventurer w. Plate Mail & Cape |
</gallery> | </gallery> | ||
* This LMW ''"FTF-5"'' category is not official (just logical). | * This LMW ''"FTF-5"'' category is not official (just logical). | ||
| Line 262: | Line 265: | ||
image:Citadel-FTF-094.jpg|<center>(82 094) | image:Citadel-FTF-094.jpg|<center>(82 094) | ||
image:Citadel-FTF-095.jpg|<center>(82 095) | image:Citadel-FTF-095.jpg|<center>(82 095) | ||
| − | image:Citadel-FTF-42.jpg|<center>(82 096)<br>{{smg|([[#FTF-4|FTF-42]])}} | + | image:Citadel-FTF-42.jpg|<center>(82 096)<br>{{smg|([[#FTF-4|FTF-42]])}}{{Gallery-Ribbon}} |
image:Citadel-FTF-097.jpg|<center>(82 097) | image:Citadel-FTF-097.jpg|<center>(82 097) | ||
image:Citadel-FTF-098.jpg|<center>(82 098) | image:Citadel-FTF-098.jpg|<center>(82 098) | ||
| Line 271: | Line 274: | ||
image:Citadel-FTF06.jpg|<center>(82 103)<br>{{smg|([[#FTF-1|FTF-06]])}} | image:Citadel-FTF06.jpg|<center>(82 103)<br>{{smg|([[#FTF-1|FTF-06]])}} | ||
image:Citadel-FTF-21.jpg|<center>(82 104)<br>{{smg|([[#FTF-2|FTF-21]])}} | image:Citadel-FTF-21.jpg|<center>(82 104)<br>{{smg|([[#FTF-2|FTF-21]])}} | ||
| − | image:Citadel-FTF- | + | image:Citadel-FTF-105.jpg|<center>(82 105)<br>Crazy Alice<br>{{smg|([[#FTF-3|FTF-105]])}} |
image:Citadel-FTF-106.jpg|<center>(82 106) | image:Citadel-FTF-106.jpg|<center>(82 106) | ||
image:Citadel-FTF-107.jpg|<center>(82 107) | image:Citadel-FTF-107.jpg|<center>(82 107) | ||
| Line 279: | Line 282: | ||
image:Citadel-FTF-111.jpg|<center>(82 111)<br>Egbert Trueblade | image:Citadel-FTF-111.jpg|<center>(82 111)<br>Egbert Trueblade | ||
image:Citadel-FTF43.jpg|<center>(82 112)<br>{{smg|([[#FTF-4|FTF-43]])}} | image:Citadel-FTF43.jpg|<center>(82 112)<br>{{smg|([[#FTF-4|FTF-43]])}} | ||
| − | image:Citadel-FTF-113.jpg|<center>(82 113) | + | image:Citadel-FTF-113.jpg|<center>(82 113){{Gallery-Ribbon}} |
image:Citadel-FTF-114.jpg|<center>(82 114) | image:Citadel-FTF-114.jpg|<center>(82 114) | ||
image:Citadel-FTF-115.jpg|<center>(82 115) | image:Citadel-FTF-115.jpg|<center>(82 115) | ||
image:Citadel-FTF-116.jpg|<center>(82 116) | image:Citadel-FTF-116.jpg|<center>(82 116) | ||
image:Citadel-FTF-117.jpg|<center>(82 117) | image:Citadel-FTF-117.jpg|<center>(82 117) | ||
| − | image:Citadel-FTF-118.jpg|<center>(82 118) | + | image:Citadel-FTF-118.jpg|<center>(82 118)<br>{{Gallery-Ribbon}} |
image:Citadel-FTF-119.jpg|<center>(82 119)<br>Athlok Herobane | image:Citadel-FTF-119.jpg|<center>(82 119)<br>Athlok Herobane | ||
</gallery> | </gallery> | ||
| Line 303: | Line 306: | ||
image:Citadel-FTG9-v1-a.jpg|<center>FTG9 v1<br>Gnoll on Giant Boar<br>{{smg|(single piece casting)}}{{Gallery-Ribbon}} | image:Citadel-FTG9-v1-a.jpg|<center>FTG9 v1<br>Gnoll on Giant Boar<br>{{smg|(single piece casting)}}{{Gallery-Ribbon}} | ||
image:Citadel-FTG9-v2-a.jpg|<center>FTG9 v2<br>Gnoll w. Mace and Shield{{Gallery-Ribbon}} | image:Citadel-FTG9-v2-a.jpg|<center>FTG9 v2<br>Gnoll w. Mace and Shield{{Gallery-Ribbon}} | ||
| − | image:Citadel- | + | image:Citadel-FF-67-1.jpg|<center>FTG9 v2<br>Giant Boar<br>{{smg|(for the later 2-piece castings)}}<br>{{smg|([[Fiend Factory (Citadel)|FF67 v1]])}} |
image:Citadel-FTG10.jpg|<center>FTG10<br>Two Drunken Gnolls | image:Citadel-FTG10.jpg|<center>FTG10<br>Two Drunken Gnolls | ||
| − | image:Citadel-FTG11- | + | image:Citadel-FTG11-v1-01.jpg|<center>FTG11<br>Female Gnoll{{Gallery-Ribbon}} |
| − | image:Citadel-FTG12- | + | image:Citadel-FTG12-01-01.jpg|<center>FTG-12 (a)<br>Gnoll Child |
| + | image:Citadel-FTG12-02-01.jpg|<center>FTG-12 (b)<br>Gnoll Child | ||
image:Citadel-FTG13.jpg|<center>FTG13<br>Gnoll Chieftain's Chariot w. 4 Crew, 2 Giant Boars | image:Citadel-FTG13.jpg|<center>FTG13<br>Gnoll Chieftain's Chariot w. 4 Crew, 2 Giant Boars | ||
| + | image:Citadel-FTG13-a.jpg|<center>FTG13 (a)<br>Giant Boar (x2) | ||
| + | image:Citadel-FTG13-b.jpg|<center>FTG13 (b)<br>Chieftain | ||
| + | image:Citadel-FTG13-c.jpg|<center>FTG13 (c)<br>Standard Bearer | ||
| + | image:Citadel-FTG13-d.jpg|<center>FTG13 (d)<br>Driver | ||
| + | image:Citadel-FTG13-e.jpg|<center>FTG13 (e)<br>Hanger On | ||
| + | image:Citadel-FTG13-f.jpg|<center>FTG13 (f)<br>Chariot Frame | ||
| + | image:Citadel-FTG13-g.jpg|<center>FTG13 (g)<br>Side (x2) | ||
| + | image:Citadel-FTG13-h.jpg|<center>FTG13 (h)<br>Wheel (x2) | ||
image:Citadel-FTG14.jpg|<center>FTG14<br>Gnorman the Gnoll<br>aka<br>Gilbert the Goblin Hero<br>{{smg|([[C12 Great Goblins (Citadel)#C12-1|C12/1d]])}} | image:Citadel-FTG14.jpg|<center>FTG14<br>Gnorman the Gnoll<br>aka<br>Gilbert the Goblin Hero<br>{{smg|([[C12 Great Goblins (Citadel)#C12-1|C12/1d]])}} | ||
image:Citadel-FTG15.jpg|<center>FTG15<br>Goblin Priest w. Mace | image:Citadel-FTG15.jpg|<center>FTG15<br>Goblin Priest w. Mace | ||
| Line 323: | Line 335: | ||
===Fantasy Tribe Hobgoblins<span id="FTH"/>=== | ===Fantasy Tribe Hobgoblins<span id="FTH"/>=== | ||
<gallery> | <gallery> | ||
| − | image:Citadel- | + | image:Citadel-C36-HO1C-10.jpg|<center>FTH1<br> |
| − | image:Citadel- | + | image:Citadel-C36-HO1C-06.jpg|<center>FTH2<br> |
| − | image:Citadel- | + | image:Citadel-C36-HO1C-13.jpg|<center>FTH3<br> |
| − | image:Citadel- | + | image:Citadel-C26-HO1C-18.jpg|<center>FTH4<br> |
image:Citadel-FTH5-v01.jpg|<center>FTH5<br> | image:Citadel-FTH5-v01.jpg|<center>FTH5<br> | ||
| + | image:Citadel-C36-HO1C-16.jpg|<center>FTH6<br> | ||
| + | image:Citadel-C36-HO1C-14.jpg|<center>FTH7<br> | ||
</gallery> | </gallery> | ||
* The FTH range was released in late 1982 and was never catalogued. | * The FTH range was released in late 1982 and was never catalogued. | ||
| + | * Those shown above match sketches on various flyers. | ||
* The Dragon Catalogue has a sketch of the range as ''"C36 Bugbears & Goblins"'' but is ''not yet available''. | * The Dragon Catalogue has a sketch of the range as ''"C36 Bugbears & Goblins"'' but is ''not yet available''. | ||
| − | * The First Citadel Compendium (1C) has sketches of | + | * The First Citadel Compendium (1C) has sketches of [[C36 Hobgoblins (Citadel)|C36 Hobgoblins]] - these were OOP by 1984. [[#References|[7]]] |
* In the absence of packaging or base markings, the assumption is that all 1C hobgoblins are the older FTH figures. | * In the absence of packaging or base markings, the assumption is that all 1C hobgoblins are the older FTH figures. | ||
<br> | <br> | ||
| Line 345: | Line 360: | ||
image:Citadel-FTO7.jpg|<center>FTO7<br>Orc Firing Bow{{Gallery-Ribbon}} | image:Citadel-FTO7.jpg|<center>FTO7<br>Orc Firing Bow{{Gallery-Ribbon}} | ||
image:Citadel-FTO8-v1.jpg|<center>FTO8<br>Orc Charging w. Polearm{{Gallery-Ribbon}} | image:Citadel-FTO8-v1.jpg|<center>FTO8<br>Orc Charging w. Polearm{{Gallery-Ribbon}} | ||
| − | image:Citadel-FTO9.jpg|<center>FTO9<br>Orc Advancing w. Axe & Spear{{Gallery-Ribbon}} | + | image:Citadel-FTO9.jpg|<center>FTO9<br>Orc Advancing w. Axe & Spear (& Sword){{Gallery-Ribbon}} |
image:Citadel-FTO10.jpg|<center>FTO10<br>Orc Firing Crossbow{{Gallery-Ribbon}} | image:Citadel-FTO10.jpg|<center>FTO10<br>Orc Firing Crossbow{{Gallery-Ribbon}} | ||
image:Citadel-FTO11.jpg|<center>FTO11<br>Orc Chief w. Sword & Flail{{Gallery-Ribbon}} | image:Citadel-FTO11.jpg|<center>FTO11<br>Orc Chief w. Sword & Flail{{Gallery-Ribbon}} | ||
image:Citadel-FTO12.jpg|<center>FTO12<br>Orc Bodyguard w. Battleaxe{{Gallery-Ribbon}} | image:Citadel-FTO12.jpg|<center>FTO12<br>Orc Bodyguard w. Battleaxe{{Gallery-Ribbon}} | ||
| − | image:Citadel-FTO13a.jpg|<center>FTO13<br>Orc Riding Giant War-Wyvern{{Gallery-Ribbon}} | + | image:Citadel-FTO13a-v1.jpg|<center>FTO13<br>Orc Riding Giant War-Wyvern<br>Orc{{Gallery-Ribbon}} |
| − | image:Citadel-FTO13b.jpg|<center>FTO13<br>Orc Riding Giant War-Wyvern{{Gallery-Ribbon}} | + | image:Citadel-FTO13b-v1.jpg|<center>FTO13<br>Orc Riding Giant War-Wyvern<br>Wyvern{{Gallery-Ribbon}} |
image:Citadel-FTO14.jpg|<center>FTO14<br>Ogron Foulbreath, Orc Champion | image:Citadel-FTO14.jpg|<center>FTO14<br>Ogron Foulbreath, Orc Champion | ||
image:Citadel-FTO15.jpg|<center>FTO15<br>Orc Bodyguard w. Mace of Thunder & Shield | image:Citadel-FTO15.jpg|<center>FTO15<br>Orc Bodyguard w. Mace of Thunder & Shield | ||
| Line 361: | Line 376: | ||
===Fantasy Tribe Skeletons<span id="FTS"/>=== | ===Fantasy Tribe Skeletons<span id="FTS"/>=== | ||
<gallery> | <gallery> | ||
| − | + | image:Citadel-FTS1v2-1.jpg|<center>FTS1<br>Skeleton Advancing w. Sword & Shield<br>{{smg|[[C17_Skeletons_(Citadel)#C17/1_Skeletons_One|(C17/1a)]]}}{{Gallery-Ribbon}} | |
| − | image:Citadel-FTS1v2-1.jpg|<center>FTS1 | ||
image:Citadel-FTS2-1.jpg|<center>FTS2<br>Skeleton Attacking w. Scimitar<br>{{smg|[[C17_Skeletons_(Citadel)#C17/1_Skeletons_One|(C17/1b)]]}}{{Gallery-Ribbon}} | image:Citadel-FTS2-1.jpg|<center>FTS2<br>Skeleton Attacking w. Scimitar<br>{{smg|[[C17_Skeletons_(Citadel)#C17/1_Skeletons_One|(C17/1b)]]}}{{Gallery-Ribbon}} | ||
| − | + | image:Citadel-FTS3v2-1.jpg|<center>FTS3<br>Skeleton Attacking w. Sword<br>{{smg|[[C17_Skeletons_(Citadel)#C17/1_Skeletons_One|(C17/1c)]]}}{{Gallery-Ribbon}} | |
| − | image:Citadel-FTS3v2-1.jpg|<center>FTS3 | + | image:Citadel-FTS4v2-1.jpg|<center>FTS4<br>Skeleton Charging w. Spear<br>{{smg|[[C17_Skeletons_(Citadel)#C17/2_Skeletons_Two|(C17/2a)]]}}{{Gallery-Ribbon}} |
| − | + | image:Citadel-FTS5v2-1.jpg|<center>FTS5<br>Skeleton Attacking w. Axe & Shield<br>{{smg|[[C17_Skeletons_(Citadel)#C17/3_Skeletons_Three|(C17/3a)]]}}{{Gallery-Ribbon}} | |
| − | image:Citadel-FTS4v2-1.jpg|<center>FTS4 | ||
| − | |||
| − | image:Citadel-FTS5v2-1.jpg|<center>FTS5 | ||
image:Citadel-FTS6-1.jpg|<center>FTS6<br>Skeleton w. Bow<br>{{smg|[[C17_Skeletons_(Citadel)#C17/2_Skeletons_Two|(C17/2c)]]}}{{Gallery-Ribbon}} | image:Citadel-FTS6-1.jpg|<center>FTS6<br>Skeleton w. Bow<br>{{smg|[[C17_Skeletons_(Citadel)#C17/2_Skeletons_Two|(C17/2c)]]}}{{Gallery-Ribbon}} | ||
| − | + | image:Citadel-FTS7v2-1.jpg|<center>FTS7<br>Skeleton Swinging Club<br>{{smg|[[C17_Skeletons_(Citadel)#C17/3_Skeletons_Three|(C17/3b)]]}}{{Gallery-Ribbon}} | |
| − | image:Citadel-FTS7v2-1.jpg|<center>FTS7 | + | image:Citadel-FTS8v2-1.jpg|<center>FTS8<br>Skeleton Advancing w. Pitchfork<br>{{smg|[[C17_Skeletons_(Citadel)#C17/2_Skeletons_Two|(C17/2b)]]}}{{Gallery-Ribbon}} |
| − | + | image:Citadel-FTS9v2-1.jpg|<center>FTS9<br>Skeleton Attacking w. Dagger<br>{{smg|[[C17_Skeletons_(Citadel)#C17/3_Skeletons_Three|(C17/3c)]]}}{{Gallery-Ribbon}} | |
| − | image:Citadel-FTS8v2-1.jpg|<center>FTS8 | ||
| − | |||
| − | image:Citadel-FTS9v2-1.jpg|<center>FTS9 | ||
image:Citadel-FTS10-1.jpg|<center>FTS10<br>Skeleton Hacking w. Sword <br>{{smg|[[C17_Skeletons_(Citadel)#C17/1_Skeletons_One|(C17/1d)]]}}{{Gallery-Ribbon}} | image:Citadel-FTS10-1.jpg|<center>FTS10<br>Skeleton Hacking w. Sword <br>{{smg|[[C17_Skeletons_(Citadel)#C17/1_Skeletons_One|(C17/1d)]]}}{{Gallery-Ribbon}} | ||
image:Citadel-FTS11-1.jpg|<center>FTS11<br>Dwarf Skeleton w. Axe & Shield{{Gallery-Ribbon}} | image:Citadel-FTS11-1.jpg|<center>FTS11<br>Dwarf Skeleton w. Axe & Shield{{Gallery-Ribbon}} | ||
| − | image:Citadel-FTS12-1.jpg|<center>FTS12<br>Halfling Skeleton w. Dagger & Shield{{Gallery-Ribbon}} | + | image:Citadel-FTS12-1-01.jpg|<center>FTS12<br>Halfling Skeleton w. Dagger & Shield{{Gallery-Ribbon}} |
image:Citadel-FTS13.jpg|<center>FTS13<br>Skeleton King<br>{{smg|[[C18_Undead_(Citadel)#C18/F2_More_Undead|(C18/2a)]]}} | image:Citadel-FTS13.jpg|<center>FTS13<br>Skeleton King<br>{{smg|[[C18_Undead_(Citadel)#C18/F2_More_Undead|(C18/2a)]]}} | ||
image:Citadel-FTS14-1.jpg|<center>FTS14<br>Skeleton Priest<br>{{smg|[[C18_Undead_(Citadel)#C18/1_Undead_One|(C18/1a)]]}}{{Gallery-Ribbon}} | image:Citadel-FTS14-1.jpg|<center>FTS14<br>Skeleton Priest<br>{{smg|[[C18_Undead_(Citadel)#C18/1_Undead_One|(C18/1a)]]}}{{Gallery-Ribbon}} | ||
| Line 456: | Line 464: | ||
* [10], Military Modelling, ''"Fantasy Tribe Fighters (advert)", Nov 1982, page 820 | * [10], Military Modelling, ''"Fantasy Tribe Fighters (advert)", Nov 1982, page 820 | ||
* {{elink|http://www.collecting-citadel-miniatures.com/wiki/index.php/Category:Fantasy|[11]}} CCM, ''"Fantasy"'' | * {{elink|http://www.collecting-citadel-miniatures.com/wiki/index.php/Category:Fantasy|[11]}} CCM, ''"Fantasy"'' | ||
| + | * {{elink|http://www.solegends.com/citads1987c/index.htm|[12]}}, SoL, ''"Original Dwarfs Flyer"'' | ||
| + | * [13], John T. Sapienza, Jr., ''"Metal Marvels"'', "Different Worlds 24" (Sep 1982), page 24-27 | ||
<br> | <br> | ||
| − | [[Category:Citadel | + | [[Category:Citadel Ranges (1979-1983)]] |
Revision as of 20:32, 3 November 2019
![]()
Citadel's Fantasy Tribes series had a wide range of figure variations with many models having only slight modifications to a basic pose. Most of the known variations are uncatalogued but most of them can be viewed at CCM [6], as well as here. The Fantasy Tribes range was listed with a few pictures in Citadel catalogues prior to the 1983 Dragon Catalogue. In that catalogue a few Fantasy Tribe figures were carried over into the new 'C' Series codes. All of those models, though, were quickly retired and the Fantasy Tribes era was effectively over. However, the range was also manufactured under licence by Ral Partha (USA) and RAFM (Canada) and figures from this series are pictured in early 1980s catalogues from both companies.
Fantasy Tribe Dragons

DRG1
Red Dragon
DRG2
Green Dragon
(parts)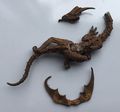
DRG3
Ice Dragon
DRG4
Golden Dragon
(parts)
Heads Variant- Citadel-DRG-wing-01.jpg
Wings Variant


- The Fantasy Tribe Dragons appeared in late 1982 and did not have the "FT" code prefix.
- All of these came with a choice of 3 heads and one of two different wing types.
- All of the FT Dragons moved to the C11 Dragons range in 1983.
Fantasy Tribe Dwarfs

FTD1
Dwarf w. Spear & SwordVariant
FTD2
Dwarf w. Light Crossbow & SwordVariant
FTD3
Dwarf w. Sword & Pole ArmVariant
FTD4
Dwarf w. Mace & AxeVariant
FTD5
Dwarf w. Axe & Heavy CrossbowVariant
FTD6
Dwarf w. Axe & HammerVariant
FTD7
Dwarf w. Hammer & PickVariant
FTD8
Dwarf Standard Bearer w. AxeVariant
FTD9
Dwarf Chieftain in Plate Mail w. SwordVariant
FTD10
Dwarf Trumpeter w. SwordVariant
FTD11
Female Dwarf
FTD12
Dwarf Children
Boy
FTD12
Dwarf Children
Girl
FTD13
The Dwarf w. No Name
FTD14
Dwarf Stretcher Party
FTD15
Mounted Dwarf
FTD16 (a)
Dwarf War Engine
Master Gunner
FTD16 (b)
Dwarf War Engine
Gunner
FTD16 (c)
Dwarf War Engine
Spotter- Citadel-FTD16d.jpg
FTD16 (d)
Dwarf War Engine
War Engine - Citadel-FTD17.jpg
FTD17
Dwarf w. Light Crossbow & Axe 
FTD18
Dwarf w. Axe & Knife- Citadel-FTD19.jpg
FTD19
Dwarf Champion w. Two-handed Axe - Citadel-FTD20.jpg
FTD20
Dwarf Champion in Plate Armour w. Two-Handed Sword


- FTD1 to FTD16 are listed in the Citadel Catalogs
- FTD17 to FTD20 are listed in Ral Partha 1984 Imports Catalog [4]
- FTD21 to FTD26 (and an alternative FTD11) were released by Ral Partha: see Fantasy Tribe Dwarves
- Figures with variations: FTD1,FTD2,FTD3,FTD4,FTD5,FTD6,FTD7,FTD8,FTD9,FTD10
- Some of these figures were reused in the C07 & C08 Dwarf Warriors
- In 1987, a few variants were re-issued briefly as seen on the "Original Dwarfs Flyer" [12].
Fantasy Tribe Fighters
The FTF range was released around November 1982. In the UK, the FTF series was grouped under four categories - FTF-1 to FTF-4 with no specific numbering for the figures. In Canada and the USA, the figures were given specific codes [8] but they followed the same number-range blocks as the UK. Missing numbers probably dont exist - it is likely the gaps were intended for future releases. We use the numbered product codes where possible with the addition of the LMW specific categories of FTF-5 Adventurers, FTF-6 Knights & Heroes and FTF-7 Vikings, and we revert to an FTF-U Unnumbered section for all the rest - these groupings all relate to the USA / Canada releases.
However, there was also a large, 1-page advert [11] that showed sketches of 119 (!) FTF figures. This shows the bulk of the range including some but not all from the North American listings. Most of the range would end up in the new C01 Fighters series in late 1983 where they kept to the same (official) FTF categories.
Note: figures in the Ral Partha version of the Fantasy Tribe Fighters series were redesigned after Partha and Citadel parted company.
FTF-1 Fighters

FTF-01
Fighter w. Sword & Buckler
(82 060)
FTF-02
Unarmoured Fighter w. Sword & Bow
(82 024)
FTF-03
Fighter in 3/4 Plate Armour
(82 034)
FTF-04
Barbarian Fighter w. 2-handed Sword
(82 018)
FTF-05
Fighter in Full Helm w. Crest
(82 015)
FTF-06
Eastern Fighter w. Scimitar
(82 103)


FTF-2 Paladins

FTF-20
Impoverished Paladin
(82 091)
FTF-21
Paladin w. Mace
(82 104)
FTF-22
Paladin w. Hand Axe
(82 008)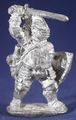
FTF-23
Paladin w. Full Gear Pack
(82 011)
FTF-24
Rich / Royal Paladin
(82 045)
FTF-25
Paladin on Quest


FTF-3 Female Fighters

FTF-30
Female Fighter w. Pack & Sword
(82 051)- Citadel-FTF-31.jpg
FTF-31
Brunhilda, Fat Lady Fighter
(82 056) 
FTF-32
Female Fighter in Plate Armour
(82 062)
FTF-33
Olga Bone Crush w. Mace
(82 057)
FTF-34
Female Barbarian w. Sword & Shield
(82 105)
FTF-35
Lila the Swift w. Scimitar
(82 070)


FTF-4 Chaos Warriors
- Citadel-FTF-40.jpg
FTF-40
Dragon Knight of Chaos in Plate Armour
(82 080) 
FTF-41
Champion of Chaos w. Sword
(82 043)
FTF-42
Female Chaos Warrior w. Sword, Shield & Bow
(82 096)
FTF-43
Captain of Chaos w. Mace
(82 112)
FTF-44
Chaotic Adventurer w. Sword & Gauntlet Knife
(82 038)
FTF-45
(Drok, Death Knight of Chaos)


- The FTF-45 code & name is a stretch: this figure was in set FTF301 but was replaced by the Ral Partha sculpt for FTF-45.
FTF-5 Adventurers

FTF-50
Adventurer w. Breast Plate & Sword
(82 092)
FTF-52
Adventurer in Chainmail
FTF-53
Unarmoured Adventurer in Ambush
(82 025)
FTF-54
Adventurer in Leather Armour
(82 088)
FTF-55
Truk the Well Provided
(82 110)- Ctadel-FTF-56.jpg
FTF-56
Adventurer Prince Ardelon Lonestar 
FTF-57
Heavy Equipped Adventurer w. Crossbow
FTF-58
Knightly Adventurer w. Mail & Shield
FTF-59
Adventurer w. Plate Mail & Cape


- This LMW "FTF-5" category is not official (just logical).
FTF-6 Knights & Heroes

FTF-60
Knightly Warrior in Plate Mail
FTF-61
Hero in Chainmail w. Axe
FTF-62
Paladin in Plate Mail Double-Armed- Citadel-FTF-63.jpg
FTF-63
Paladin Berserker - Citadel-FTF-64.jpg
FTF-64
Chivalric Warrior w. Plate & Axe 
FTF-65
Fighter in Veil Helm w. Axe- Citadel-FTF-66.jpg
FTF-66
Fighter in Spiked Helm w. Broadsword - Citadel-FTF-67.jpg
FTF-67
Adelaide 'The Hooded Huntress' w. Scimitar 
FTF-68
Chivalric Female Fighter


- This LMW "FTF-6" category is not official (just logical).
- FTF-2 & FTF-3 could apply to most of these but we keep them in sequence order as "Knights & Heroes".
FTF-7 Vikings

FTF-70
Norse Warrior w. Chain Helm & Spear
FTF-71
Norse Berserker
FTF-72
Norse Axeman in Mail Armour w. Axe
FTF-73
Norse Bowman in Leather Armour
FTF-74
Norse Warrior w. Sword & Bow
FTF-75
Young Norse Warrior in Fur w. Axe
FTF-76
Norse Chieftain in Horned Helm


- This LMW "FTF-7" category is not official (just logical).
FTF-U Unnumbered

(01) 
(02) 
(03) 
(04) 
(05) - Citadel-FTF-U06.jpg
(06) - Citadel-FTF-U07.jpg
(07) - Citadel-FTF-U08.jpg
(08)


- This LMW "FTF-U" category is not official (just convenient).
FTF Advert 1982
- Citadel-FTF-001.jpg
(82 001) 
(82 002) 
(82 003) 
(82 004) 
(82 005)
(variant w. cloak)- Citadel-FTF-006.jpg
(82 006) 
(82 007) (82 008)
(FTF-22)
(82 009) 
(82 010) (82 011)
(FTF-23)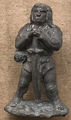
(82 012) - Citadel-FTF-013.jpg
(82 013) 
(82 014) (82 015)
(FTF-05)
(82 016) - Citadel-FTF-017.jpg
(82 017) (82 018)
(FTF-04)
(82 019) - Citadel-FTF-020.jpg
(82 020) - Citadel-FTF-021.jpg
(82 021) - Citadel-FTF-022.jpg
(82 022) 
(82 023) (82 024)
(FTF-02)(82 025)
(FTF-53)
(82 026) - Citadel-FTF-027.jpg
(82 027) 
(82 028) 
(82 029) 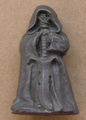
(82 030) 
(82 031) 
(82 032) 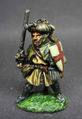
(82 033) (82 034)
(FTF-03)- Citadel-FTF-035.jpg
(82 035) 
(82 036) - Citadel-FTF-037.jpg
(82 037) (82 038)
(FTF-44)
(82 039) 
(82 040) 
(82 041) 
(82 042) (82 043)
(FTF-41)
(82 044) (82 045)
(FTF-24)- Citadel-FTF-046.jpg
(82 046) 
(82 047) - Citadel-FTF-048.jpg
(82 048) 
(82 049) 
(82 050) (82 051)
(FTF-30)- Citadel-FTF-052.jpg
(82 052) - Citadel-FTF-053.jpg
(82 053) 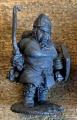
(82 054) - Citadel-FTF-055.jpg
(82 055) - Citadel-FTF-31.jpg
(82 056)
(FTF-31) (82 057)
(FTF-33)
(82 058) 
(82 059) (82 060)
(FTF-01)
(82 061) (82 062)
(FTF-32)- Citadel-FTF-063.jpg
(82 063) - Citadel-FTF-064.jpg
(82 064) 
(82 065) 
(82 067) 
(82 068) 
(82 069) (82 070)
(FTF-35)- Citadel-FTF-071.jpg
(82 071) 
(82 072) 
(82 073) - Citadel-FTF-074.jpg
(82 074) 
(82 075) 
(82 076) - Citadel-FTF-077.jpg
(82 077) - Citadel-FTF-078.jpg
(82 078) 
(82 079) - Citadel-FTF-40.jpg
(82 080)
(FTF-40) 
(82 081) - Citadel-FTF-082.jpg
(82 082) 
(82 083) 
(82 084)
Ulmric Ogreslayer
(82 085) 
(82 086) - Citadel-FTF-087.jpg
(82 087) (82 088)
(FTF-54)
(82 089) Variant
(82 090) (82 091)
(FTF-20)(82 092)
(FTF-50)- Citadel-FTF-093.jpg
(82 093) 
(82 094) 
(82 095) 
(82 096)
(FTF-42)Variant
(82 097) 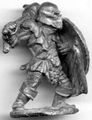
(82 098) - Citadel-FTF-099.jpg
(82 099) - Citadel-FTF-100.jpg
(82 100) 
(82 101)
Desdimona Darksword
(82 102) (82 103)
(FTF-06)(82 104)
(FTF-21)- Citadel-FTF-105.jpg
(82 105)
Crazy Alice
(FTF-105) 
(82 106) 
(82 107) 
(82 108) 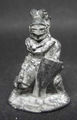
(82 109) (82 110)
(FTF-55)
(82 111)
Egbert Trueblade(82 112)
(FTF-43)
(82 113) Variant- Citadel-FTF-114.jpg
(82 114) 
(82 115) 
(82 116) 
(82 117) 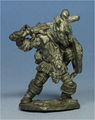
(82 118)
Variant
(82 119)
Athlok Herobane


- This block is listed in rough numerical order as shown on the advert.
- For many of them it is easy to assign them to the FTF-1,2,3 & 4 categories above.
Fantasy Tribe Gnolls

FTG1
Gnoll w. Pole Arm
(C12/1a)Variant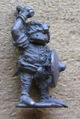
FTG2
Gnoll Attacking w. Hand Weapon
(C12/1b)Variant
FTG3
Gnoll Standing w. Hand Weapon
(C12/1c)Variant
FTG4
Gnoll Chieftain
(C12/2c)
FTG5
Gnoll Standard Bearer
(C12/2d)
FTG6
Great Gnoll Halberdier
(C12/2a)
(RAFM bag)Variant
FTG7
Great Gnoll w. Hand Weapon
(C12/2b)Variant- Citadel-FTG8-a.jpg
FTG8
Great Gnoll on Giant BoarVariant - Citadel-FTG9-v1-a.jpg
FTG9 v1
Gnoll on Giant Boar
(single piece casting)Variant 
FTG9 v2
Gnoll w. Mace and ShieldVariant
FTG9 v2
Giant Boar
(for the later 2-piece castings)
(FF67 v1)
FTG10
Two Drunken Gnolls
FTG11
Female GnollVariant
FTG-12 (a)
Gnoll Child
FTG-12 (b)
Gnoll Child
FTG13
Gnoll Chieftain's Chariot w. 4 Crew, 2 Giant Boars
FTG13 (a)
Giant Boar (x2)
FTG13 (b)
Chieftain
FTG13 (c)
Standard Bearer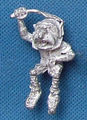
FTG13 (d)
Driver
FTG13 (e)
Hanger On
FTG13 (f)
Chariot Frame
FTG13 (g)
Side (x2)
FTG13 (h)
Wheel (x2)
FTG14
Gnorman the Gnoll
aka
Gilbert the Goblin Hero
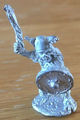
(C12/1d)- Citadel-FTG15.jpg
FTG15
Goblin Priest w. Mace 
FTG16
Goblin w. Short Sword & Shield
(C12)
FTG17
Goblin Archer
(C12)- Citadel-FTG18.jpg
FTG18
Goblin w. Halberd & Shield - Citadel-FTG19.jpg
FTG19
Lancer on Giant War Boar


- Fantasy Tribe Gnolls first appeared in the 1981 Blue Citadel Catalogue.
- Fantasy Tribe Gnolls changed their name to Goblins - see 1983 Blue catalogue, p8 [2]
- The difference between a Gnoll and a Giant Gnoll, in most cases, appears to be the length of their ears.
- Figures with multiple variations: FTG1, FTG2, FTG3, FTG6, FTG7, FTG8, FTG9, FTG11.
Fantasy Tribe Hobgoblins
FTH1

FTH2

FTH3

FTH4

FTH5

FTH6

FTH7


- The FTH range was released in late 1982 and was never catalogued.
- Those shown above match sketches on various flyers.
- The Dragon Catalogue has a sketch of the range as "C36 Bugbears & Goblins" but is not yet available.
- The First Citadel Compendium (1C) has sketches of C36 Hobgoblins - these were OOP by 1984. [7]
- In the absence of packaging or base markings, the assumption is that all 1C hobgoblins are the older FTH figures.
Fantasy Tribe Orcs

FTO1
Orc Advancing w. Mace & ShieldVariant
FTO2
Orc Attacking w. Sword & ShieldVariant
FTO3
Orc Advancing w. Sword, Spear & ShieldVariant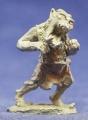
FTO4
Orc Charging w. SpearVariant
FTO5
Orc Advancing w. HalberdVariant
FTO6
Orc Swinging AxeVariant
FTO7
Orc Firing BowVariant
FTO8
Orc Charging w. PolearmVariant
FTO9
Orc Advancing w. Axe & Spear (& Sword)Variant
FTO10
Orc Firing CrossbowVariant
FTO11
Orc Chief w. Sword & FlailVariant
FTO12
Orc Bodyguard w. BattleaxeVariant
FTO13
Orc Riding Giant War-Wyvern
OrcVariant
FTO13
Orc Riding Giant War-Wyvern
WyvernVariant
FTO14
Ogron Foulbreath, Orc Champion
FTO15
Orc Bodyguard w. Mace of Thunder & Shield


- See 1983 Yellow catalogue, p9 [5]
- All of these figures, except for FTO14 and FTO15, exist in several variations.
- All of these figures, except for FTO13, were carried forward into the C15 & C16 series.
Fantasy Tribe Skeletons

FTS1
Skeleton Advancing w. Sword & Shield
(C17/1a)Variant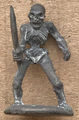
FTS2
Skeleton Attacking w. Scimitar
(C17/1b)Variant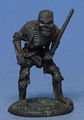
FTS3
Skeleton Attacking w. Sword
(C17/1c)Variant
FTS4
Skeleton Charging w. Spear
(C17/2a)Variant
FTS5
Skeleton Attacking w. Axe & Shield
(C17/3a)Variant
FTS6
Skeleton w. Bow
(C17/2c)Variant
FTS7
Skeleton Swinging Club
(C17/3b)Variant
FTS8
Skeleton Advancing w. Pitchfork
(C17/2b)Variant
FTS9
Skeleton Attacking w. Dagger
(C17/3c)Variant
FTS10
Skeleton Hacking w. Sword
(C17/1d)Variant
FTS11
Dwarf Skeleton w. Axe & ShieldVariant
FTS12
Halfling Skeleton w. Dagger & ShieldVariant
FTS13
Skeleton King
(C18/2a)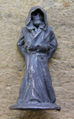
FTS14
Skeleton Priest
(C18/1a)Variant
FTS15
Slain Skeleton
(C17/2e)
FTS16
Skeleton Lord
(C17/3e)Variant
FTS17
Grim Reaper
(C17/2d)
FTS18
Standard Bearer of the Legions of Hell
(C17/3d)
FTS19
Skeleton w. Sickle
FTS20
Skeleton Stalking in Chain Mail w. Sword & Shield
FTS21
Skeleton WarriorVariant
FTS22
Skeleton Rider on Horse of HellVariant
FTS23
Skeleton Baron in Plate on Zombie Horse
FTS24
Skeleton Warrior w. Bone Crusher Mace & Shield
FTS25
Skeleton Champion w. Haunted Axe & Laughing Shield


- See 1983 Yellow catalogue, p9 [5] & 1983 Blue catalogue, p9 [2]
- Several figures were resculpted as noted in the 1983 Blue catalogue.
- Some figures moved into C17 and C18 in the 1983 Dragon Catalogue.
- FTS19 onwards are from the 1984 Ral Parth Imports catalog [4].
- Figures with variations: FTS1 to FTS12, FTS14, FTS16, FTS21.
Fantasy Tribe Trolls

FTT2 v1
Troll swinging Axe
Tom Meier- Citadel-FTT2v2.jpg
FTT2 v2
Troll swinging Axe 
FTT5 v1
Troll in Furs with Axe and Shield
Tom Meier
FTT5 v2
Troll in Furs with Axe and Shield
FTT7 (v2)
Trollwife
Michael Perry
(C20/1e)
FTT8
Troll Brat hurling Rocks
Tom Meier
FTT9
Giant Half-Troll Champion- Citadel-FTT10.jpg
FTT10
Giant Two Headed Troll


- FTT2, FTT5 - rescuplted in 1982 [1][2]
- FTT7, FTT8 - resculpted at some point [3]
- See 1983 Blue catalogue, p9 [2]
Fantasy Tribe Wizards
The short lived "Fantasy Tribes Wizards" (FTW) series was only listed on a 1982/1983 flyer. It was re-coded as C02 Wizards and was first shown in the "Dragon Catalogue". The C02 set had the same list of figures as FTW - the only slight difference was probably a mistake on the earlier flyer which had missed out ""FTW3d". Refer to the 'C' Series page for this set.
Fantasy Tribe Zombies

FTZ1
Zombie Staggering Forward
(C19/1b)Variant
FTZ2
Zombie Attacking
(C19/1c)Variant
FTZ3
Zombie w. Club
(C19/2a ?)Variant
FTZ4
Zombie w. Butcher's Knife
(C19/2b)Variant
FTZ5
Zombie w. Axe
(C19/2c)Variant
FTZ6
Zombie w. Butcher's Cleaver
(C19/3a)Variant
FTZ7
Zombie w. Spiked Club
(C19/3b)Variant
FTZ8
Slain Zombie
(C19/3c ?)
FTZ9
Assorted Zombie Heads


- The FTZ range was never catalogued, appearing only in White Dwarf adverts and Citadel flyers.
- Figures with variations: FTZ1 to FTZ7.
- All of these (probably) moved to C19 Zombies as listed in the Dragon Catalogue but FTZ3 and FTZ8 were not explicitly cross-referenced there.
- This range has an enormous number of variations: for more detail refer to the excellent FTZ page on the Collecting Citadel Miniatures website. [6]
References
- [1], Swords & Dorkery, "Mystery minis, 50% solution", (Sep 1, 2010)
- [2], SoL, "1982 (Blue) Citadel Miniatures Catalogue"
- [3], The Stuff of Legends, "FTT7 and FTT8 were resculpted at some point by Alan Perry & Michael Perry".
- [4], SoL, "Ral Partha Imports 1984 Catalog".
- [5], SoL, "1982 (Yellow) Citadel Miniatures Catalogue"
- [6], CCM, "Zombies - FTZ Fantasy Tribe (solid base)"
- [7], SoL, "C36 Hobgoblins" (documentation)
- [8], RAFM, "RAFM 1986 Canada (catalog)", page 36-37
- [9], Ral Partha, "Ral Partha Imports 1984 Catalog", page 6-7
- [10], Military Modelling, "Fantasy Tribe Fighters (advert)", Nov 1982, page 820
- [11] CCM, "Fantasy"
- [12], SoL, "Original Dwarfs Flyer"
- [13], John T. Sapienza, Jr., "Metal Marvels", "Different Worlds 24" (Sep 1982), page 24-27