Difference between revisions of "Wizzards and Warriors"
Cattwister (talk | contribs) m (→<span id="Single">Single</span> Figures - pre bagged codes) |
Cattwister (talk | contribs) m (→<span id="SS09">SS09</span> The Guard Room) |
||
| (17 intermediate revisions by 2 users not shown) | |||
| Line 95: | Line 95: | ||
* [[#SS11|SS11 Throne Room]] | * [[#SS11|SS11 Throne Room]] | ||
* [[#SS12|SS12 Drunken Dragon Inn]] | * [[#SS12|SS12 Drunken Dragon Inn]] | ||
| + | * | ||
| + | * '''(BB) Battling Behemoths''' | ||
| + | * [[#BB1|BB1 Giant Dragon]] | ||
| + | * [[#BB2|BB2 Giant Griffin]] | ||
* | * | ||
* '''(SP) Specials''' | * '''(SP) Specials''' | ||
| − | |||
| − | |||
* [[#Specials|Other Specials]] | * [[#Specials|Other Specials]] | ||
* | * | ||
| Line 191: | Line 193: | ||
image:g-waw-wsingle81.jpg|<center>W-81<br>Sorceror w/hand and horn | image:g-waw-wsingle81.jpg|<center>W-81<br>Sorceror w/hand and horn | ||
image:g-waw-wsingle82-f.jpg|<center>W-82<br>Sorceror w/familiar | image:g-waw-wsingle82-f.jpg|<center>W-82<br>Sorceror w/familiar | ||
| − | image:g-waw-wsingle83.jpg|<center>W-83<br>Mounted Fightingman w | + | image:g-waw-wsingle83.jpg|<center>W-83<br>Mounted Fightingman w. spear |
| − | image:g-waw-wsingle84.jpg|<center>W-84<br>Mounted Fightingman w | + | image:g-waw-wsingle84.jpg|<center>W-84<br>Mounted Fightingman w. sword{{Gallery-Ribbon|Unconfirmed}} |
| − | image:g-waw-wsingle85.jpg|<center>W-85<br>Mounted Fightingman w | + | image:g-waw-wsingle85.jpg|<center>W-85<br>Mounted Fightingman w. bow |
image:g-waw-wsingle86.jpg|<center>W-86<br>Mounted Elf w/bow | image:g-waw-wsingle86.jpg|<center>W-86<br>Mounted Elf w/bow | ||
image:g-waw-wsingle87.jpg|<center>W-87<br>Mounted Dwarf | image:g-waw-wsingle87.jpg|<center>W-87<br>Mounted Dwarf | ||
| Line 457: | Line 459: | ||
<br> | <br> | ||
| − | ==== | + | ====<span id="W30">W30</span> Werewolves & Wererats==== |
<gallery> | <gallery> | ||
| − | image: | + | image:G-waw-ww02g-01.jpg|<center>W30a<br>Werewolves & Wererats - Wererats |
image:G-albs-5002j.jpg|<center>W30b<br>Werewolves & Wererats - Werewolves | image:G-albs-5002j.jpg|<center>W30b<br>Werewolves & Wererats - Werewolves | ||
</gallery> | </gallery> | ||
| Line 521: | Line 523: | ||
<br> | <br> | ||
| − | ==== | + | ====<span id="W37">W37</span> 5-headed Hydra==== |
<gallery> | <gallery> | ||
| − | image:g-waw-w37.jpg|<center>W37<br>5-headed Hydra ( | + | image:g-waw-w37.jpg|<center>W37<br>5-headed Hydra<br>{{smg|(assembled)}} |
| − | image:g-waw- | + | image:g-waw-w37a.jpg|<center>W37<br>5-headed Hydra<br>{{smg|(blister)}} |
| − | image:g-waw-w37b.jpg|<center>W37<br> | + | image:g-waw-w37b.jpg|<center>W37<br>5-headed Hydra<br>{{smg|(catalog)}} |
| + | image:g-waw-w37a-01.jpg|<center>W37 (a)<br>Hydra Body | ||
| + | image:g-waw-w37b-01.jpg|<center>W37 (b)<br>Hydra 3-Heads | ||
| + | image:g-waw-w37c-01.jpg|<center>W37 (c)<br>Hydra 2-Heads | ||
</gallery> | </gallery> | ||
<br> | <br> | ||
| Line 696: | Line 701: | ||
<br> | <br> | ||
| − | ==== | + | ====<span id="W58">W58</span> Carrion Creepers==== |
<gallery> | <gallery> | ||
| − | |||
image:g-waw-w58b.jpg|<center>W58<br>Carrion Creepers | image:g-waw-w58b.jpg|<center>W58<br>Carrion Creepers | ||
</gallery> | </gallery> | ||
<br> | <br> | ||
| − | ==== | + | ====<span id="W59">W59</span> Rust, Cube & Ooze Monsters==== |
<gallery> | <gallery> | ||
| − | image:g-waw-w59.jpg|<center>W59<br>Rust, Cube & Ooze Monsters | + | image:g-waw-w59.jpg|<center>W59<br>Rust, Cube & Ooze Monsters<br>{{smg|(blister)}} |
| − | image:g-waw-w59a.jpg|<center> | + | image:g-waw-w59a.jpg|<center>W59 (a)<br>Rust Monster |
| − | image:g-waw-w59b.jpg|<center> | + | image:g-waw-w59b.jpg|<center>W59 (b)<br>Cube Monster |
| − | image:g-waw-w59c.jpg|<center> | + | image:g-waw-w59c.jpg|<center>W59 (c)<br>Ooze Monster |
</gallery> | </gallery> | ||
<br> | <br> | ||
| Line 812: | Line 816: | ||
<br> | <br> | ||
| − | ==== | + | ====<span id="SS05">SS05</span> Torture Chamber==== |
<gallery> | <gallery> | ||
image:g-waw-Set5.jpg|<center>SS05 Torture Chamber<br>{{smg|(Blister Pack)}} | image:g-waw-Set5.jpg|<center>SS05 Torture Chamber<br>{{smg|(Blister Pack)}} | ||
| − | image:g-waw-Set5a.jpg|<center> | + | image:g-waw-Set5a.jpg|<center>SS05 (a)<br>Hooded Executioner |
| − | image:G-waw-Set5h-ii.jpg|<center> | + | image:G-waw-Set5h-ii.jpg|<center>SS05 (b)<br>Torturer with Hot Iron |
| − | image:g-waw-Set5c.jpg|<center> | + | image:g-waw-Set5c.jpg|<center>SS05 (c)<br>The Rack and the Victim |
| − | image:g-waw-Set5d.jpg|<center> | + | image:g-waw-Set5d.jpg|<center>SS05 (d)<br>The Iron Maiden |
| − | image:g-waw-Set5e.jpg|<center> | + | image:g-waw-Set5e.jpg|<center>SS05 (e)<br>Table with Torture Devices |
| − | image:g-waw-Set5f.jpg|<center> | + | image:g-waw-Set5f.jpg|<center>SS05 (f)<br>Brazier with Hot Irons |
| − | image:g-waw-Set5g.jpg|<center> | + | image:g-waw-Set5g.jpg|<center>SS05 (g)<br>The Stocks |
| − | image:g-waw-Set5h.jpg|<center> | + | image:g-waw-Set5h.jpg|<center>SS05 (h)<br>Torture Table |
| − | + | image:g-waw-Set5b-i2.jpg|<center>SS05 (i)<br>Chained Prisoner (?) | |
| − | image:g-waw-Set5b-i2.jpg|<center> | ||
</gallery> | </gallery> | ||
<br> | <br> | ||
| Line 853: | Line 856: | ||
<br> | <br> | ||
| − | ==== | + | ====<span id="SS07">SS07</span> The Temple==== |
<gallery> | <gallery> | ||
image:g-waw-Set7.jpg|<center>SS07<br>The Temple<br>{{smg|(Blister Pack)}} | image:g-waw-Set7.jpg|<center>SS07<br>The Temple<br>{{smg|(Blister Pack)}} | ||
| Line 861: | Line 864: | ||
image:g-waw-Set7c-01.jpg|<center>SS07 (c)<br>High priest holding up heart & knife | image:g-waw-Set7c-01.jpg|<center>SS07 (c)<br>High priest holding up heart & knife | ||
| − | image:g-waw-Set7d.jpg|<center>SS07 (d)<br>Lesser Priest (x2) | + | image:g-waw-Set7d-01.jpg|<center>SS07 (d)<br>Lesser Priest (x2) |
image:g-waw-Set7e.jpg|<center>SS07 (e)<br>Statue (x2) | image:g-waw-Set7e.jpg|<center>SS07 (e)<br>Statue (x2) | ||
image:g-waw-Set7f.jpg|<center>SS07 (f)<br>Temple Brazier (x2) | image:g-waw-Set7f.jpg|<center>SS07 (f)<br>Temple Brazier (x2) | ||
| Line 867: | Line 870: | ||
<br> | <br> | ||
| − | ==== | + | ====<span id="SS08">SS08</span> Treasure Vault==== |
<gallery> | <gallery> | ||
image:g-waw-Set8.jpg|<center>SS08<br>Treasure Vault<br>{{smg|(Blister Pack)}} | image:g-waw-Set8.jpg|<center>SS08<br>Treasure Vault<br>{{smg|(Blister Pack)}} | ||
| − | image:g-waw-Set8ad.jpg|<center>SS08<br> | + | image:g-waw-Set8ad.jpg|<center>SS08<br>Treasure Vault<br>{{smg|(advert)}} |
| + | image:g-waw-Set8-04.jpg|<center>SS08<br>Treasure Vault<br>{{smg|(contents)}} | ||
image:g-waw-Set8a.jpg|<center>SS08a<br>Stack of Large Chests | image:g-waw-Set8a.jpg|<center>SS08a<br>Stack of Large Chests | ||
| + | |||
image:g-waw-Set8b.jpg|<center>SS08b<br>Pile of Gold Bars (x2) | image:g-waw-Set8b.jpg|<center>SS08b<br>Pile of Gold Bars (x2) | ||
| − | |||
image:g-waw-Set8c.jpg|<center>SS08c<br>Pot of Gems (x2) | image:g-waw-Set8c.jpg|<center>SS08c<br>Pot of Gems (x2) | ||
image:g-waw-Set8d.jpg|<center>SS08d<br>Urn of Coins & Gems (x2) | image:g-waw-Set8d.jpg|<center>SS08d<br>Urn of Coins & Gems (x2) | ||
image:g-waw-Set8e.jpg|<center>SS08e<br>Open Chest of Coins | image:g-waw-Set8e.jpg|<center>SS08e<br>Open Chest of Coins | ||
| + | |||
image:g-waw-Set8f.jpg|<center>SS08f<br>Stack of Bags of Coins | image:g-waw-Set8f.jpg|<center>SS08f<br>Stack of Bags of Coins | ||
| − | |||
image:g-waw-Set8g.jpg|<center>SS08g<br>Pile of various Treasure Items | image:g-waw-Set8g.jpg|<center>SS08g<br>Pile of various Treasure Items | ||
image:g-waw-Set8h.jpg|<center>SS08h<br>Counting Table with Treasure | image:g-waw-Set8h.jpg|<center>SS08h<br>Counting Table with Treasure | ||
| Line 885: | Line 889: | ||
<br> | <br> | ||
| − | ==== | + | ====<span id="SS09">SS09</span> The Guard Room==== |
<gallery> | <gallery> | ||
| − | image:g-waw-Set9.jpg|<center>SS09<br>The Guard Room<br>{{smg|( | + | image:g-waw-Set9.jpg|<center>SS09<br>The Guard Room<br>{{smg|(blister)}} |
| − | image:g-waw-Set9a.jpg|<center> | + | image:g-waw-Set9a.jpg|<center>SS09 (a)<br>Bunk Bed with<br>Hanging Weapons (x2) |
| − | image:g-waw-Set9b.jpg|<center> | + | image:g-waw-Set9b.jpg|<center>SS09 (b)<br>Stack of Weapons |
| − | image:g-waw-Set9c.jpg|<center> | + | image:g-waw-Set9c-01.jpg|<center>SS09 (c)<br>Table with mugs,<br>food, lantern & bottle |
| − | image:g-waw-Set9d.jpg|<center> | + | image:g-waw-Set9d.jpg|<center>SS09 (d)<br>Stool (x2) |
| − | image:g-waw-Set9e.jpg|<center> | + | image:g-waw-Set9e.jpg|<center>SS09 (e)<br>Chest |
| − | image:g-waw-Set9f.jpg|<center> | + | image:g-waw-Set9f.jpg|<center>SS09 (f)<br>Barrel |
| − | image:g-waw-Set9g.jpg|<center> | + | image:g-waw-Set9g.jpg|<center>SS09 (g)<br>Cauldron |
</gallery> | </gallery> | ||
<br> | <br> | ||
| − | ==== | + | ====<span id="SS10">SS10<br>Sorcerer's Chariot==== |
<gallery> | <gallery> | ||
| − | image:g-waw-Set10.jpg|<center>SS10 Sorcerer's Chariot | + | image:g-waw-Set10-01.jpg|<center>SS10<br>Sorcerer's Chariot<br>{{smg|(assembled)}} |
| + | image:g-waw-Set10.jpg|<center>SS10<br>Sorcerer's Chariot<br>{{smg|(parts)}} | ||
| + | image:g-waw-Set10a-01.jpg|<center>SS10 (a)<br>Sorcerer | ||
| + | image:g-waw-Set10b-01.jpg|<center>SS10 (b)<br>Unicorn (x2) | ||
| + | image:g-waw-Set10c-01.jpg|<center>SS10 (c)<br>Chariot Haft | ||
| + | image:g-waw-Set10d-01.jpg|<center>SS10 (d)<br>Chariot Left Side | ||
| + | image:g-waw-Set10e-01.jpg|<center>SS10 (e)<br>Chariot Right Side | ||
| + | image:g-waw-Set10f-01.jpg|<center>SS10 (f)<br>Chariot Base | ||
| + | image:g-waw-Set10g-01.jpg|<center>SS10 (g)<br>Wheels (x2) | ||
</gallery> | </gallery> | ||
<br> | <br> | ||
| Line 907: | Line 919: | ||
====<span id="SS11">SS11</span> Throne Room==== | ====<span id="SS11">SS11</span> Throne Room==== | ||
<gallery> | <gallery> | ||
| − | image:g-waw-Set11.jpg|<center>SS11<br>Throne Room<br>{{smg|( | + | image:g-waw-Set11.jpg|<center>SS11<br>Throne Room<br>{{smg|(blister)}} |
| + | image:g-waw-Set11-04.jpg|<center>SS11<br>Throne Room<br>{{smg|(contents)}} | ||
image:g-waw-Set11a.jpg|<center>SS11 (a)<br>Overlord on Throne | image:g-waw-Set11a.jpg|<center>SS11 (a)<br>Overlord on Throne | ||
image:g-waw-Set11b.jpg|<center>SS11 (b)<br>Separate Heads for Overlord (x3) | image:g-waw-Set11b.jpg|<center>SS11 (b)<br>Separate Heads for Overlord (x3) | ||
| + | |||
image:g-waw-Set11c.jpg|<center>SS11 (c)<br>Braziers (x4) | image:g-waw-Set11c.jpg|<center>SS11 (c)<br>Braziers (x4) | ||
| − | |||
image:g-waw-Set11d.jpg|<center>SS11 (d)<br>Large Lion Statues (x2) | image:g-waw-Set11d.jpg|<center>SS11 (d)<br>Large Lion Statues (x2) | ||
image:g-waw-Set11e.jpg|<center>SS11 (e)<br>Plush Divan<br>(Couch) | image:g-waw-Set11e.jpg|<center>SS11 (e)<br>Plush Divan<br>(Couch) | ||
image:g-waw-Set11f.jpg|<center>SS11 (f)<br>Feasting Table | image:g-waw-Set11f.jpg|<center>SS11 (f)<br>Feasting Table | ||
| + | |||
image:g-waw-Set11g.jpg|<center>SS11 (g)<br>Fanbearer (x2) | image:g-waw-Set11g.jpg|<center>SS11 (g)<br>Fanbearer (x2) | ||
| − | |||
image:g-waw-Set11h.jpg|<center>SS11 (h)<br>Queen | image:g-waw-Set11h.jpg|<center>SS11 (h)<br>Queen | ||
image:g-waw-Set11i-01.jpg|<center>SS11 (i)<br>Queen's Leopard | image:g-waw-Set11i-01.jpg|<center>SS11 (i)<br>Queen's Leopard | ||
| Line 940: | Line 953: | ||
<br> | <br> | ||
| − | === | + | ===Battling Behemoths=== |
| − | + | * No product codes were used with these and only 24 of each are thought to exist.<br> | |
| − | ==== | + | <br> |
| + | ====<span id="BB1">BB1</span> Giant Dragon==== | ||
<gallery> | <gallery> | ||
| − | image:g-waw-1drag.jpg|<center>Special #1 | + | image:g-waw-1draga.jpg|<center>(BB1)<br>Giant Dragon<br>{{smg|(box)}} |
| − | image:g-waw-1dragB.jpg|<center> | + | image:g-waw-1drag.jpg|<center>(BB1)<br>Giant Dragon<br>{{smg|(Special #1)}} |
| − | image:g-waw-1dragc.jpg|<center> | + | image:g-waw-1dragB.jpg|<center>(BB1)<br>Giant Dragon<br>{{smg|(parts)}} |
| − | image:g-waw-1dragd.jpg|<center> | + | image:g-waw-1dragc.jpg|<center>(BB1)<br>Head |
| − | image:g-waw-1drage.jpg|<center> | + | image:g-waw-1dragd.jpg|<center>(BB1)<br>Body Left |
| − | image:g-waw-1dragf.jpg|<center> | + | image:g-waw-1dragd2.jpg|<center>(BB1)<br>Body Right |
| − | image:g-waw-1dragg.jpg|<center> | + | image:g-waw-1drage.jpg|<center>(BB1)<br>Wings |
| − | image:g-waw-1dragh.jpg|<center> | + | image:g-waw-1dragf.jpg|<center>(BB1)<br>Tail |
| + | image:g-waw-1dragg.jpg|<center>(BB1)<br>Arms | ||
| + | image:g-waw-1dragh.jpg|<center>(BB1)<br>Feet | ||
</gallery> | </gallery> | ||
| + | * Marked "GRENADIER ©1977" | ||
<br> | <br> | ||
| − | ==== | + | ====<span id="BB2">BB2</span> Giant Griffin==== |
<gallery> | <gallery> | ||
| − | image:g-waw-2grif.jpg|<center>Special #2 | + | image:g-waw-2grif-box.jpg|<center>(BB2)<br>Giant Griffin<br>{{smg|(box)}} |
| − | image:g-waw-2grif-parts.jpg|<center> | + | image:g-waw-2grif.jpg|<center>(BB2)<br>Giant Griffin<br>{{smg|(Special #2)}} |
| + | image:g-waw-2grif-parts.jpg|<center>(BB2)<br>Giant Griffin<br>{{smg|parts}} | ||
| + | image:g-waw-2grif-a01.jpg|<center>(BB2)<br>Body Right | ||
| + | image:g-waw-2grif-b01.jpg|<center>(BB2)<br>Body Left | ||
| + | image:g-waw-2grif-c01.jpg|<center>(BB2)<br>Wings | ||
| + | image:g-waw-2grif-d01.jpg|<center>(BB2)<br>Head | ||
| + | image:g-waw-2grif-e01.jpg|<center>(BB2)<br>Arms | ||
</gallery> | </gallery> | ||
<br> | <br> | ||
| − | + | ===Other Specials=== | |
<gallery> | <gallery> | ||
image:G-waw-SP1.jpg|<center>SP1<br>½-inch, 6-sided dice (white w. black pips) | image:G-waw-SP1.jpg|<center>SP1<br>½-inch, 6-sided dice (white w. black pips) | ||
Revision as of 18:43, 21 September 2021

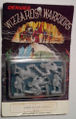
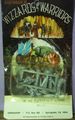
Grenadier's Wizzards and Warriors was an early fantasy range advertised in issue #4 of Dragon Magazine (December 1976). It was discontinued prior to 1980.
See also: Wizzards and Warriors - Large Boxed Sets.
Contents
- (W) Single Figures
- Single Figures
- (W) Blister Packs
- W01 Halflings
- W02 Mountain Dwarves - Swords & Hammers
- W03 Mountain Dwarves - Axes & Bows
- W04 Elves of the Forest - Swords & Bows
- W05 Elves of the Forest - Spears
- W06 Gnomes of the Rune Shield
- W07 Great Wood Treeman
- W08 Good Men of the West - Bows
- W09 Good Men of the West - Swords
- W10 Good Men of the West - Spears & Axes
- W11 Female Characters
- W12 Northern Barbarians
- W13 Sorcerers
- W14 Specialists
- W15 Orcs of the Eye - Swords & Axes
- W16 Orcs of the Eye - Bows & Spears
- W17 Orcs of the Hand - Axes & Swords
- W18 Orcs of the Hand - Bows & Polearms
- W19 Goblins of the Mount - Swords
- W20 Goblins of the Mount - Axes & Spears
- W21 Goblin Wolf Riders
- W22 Kobolds
- W23 Wood Trolls & Cave Trolls
- W24 Mordor Command Pack
- W25 Chaotic Warriors of the East
- W26 Berserkers
- W27 Mounted Dark Riders
- W28 Fire Demon & Wraiths
- W29 Slimes, Molds & Jellies
- W30 Werewolves & Wererats
- W31 Undead (Ghoul, Mummy, Wraith, etc)
- W32 Elementals
- W33 Ogre & Giant
- W34 Minotaurs & Medusas
- W35 Zombies, Skeletons & Gargoyles
- W36 Purple Worms & Giant Snakes
- W37 5-headed Hydra
- W38 Serpentine Dragon
- W39 Rearing Dragon
- W40 Wyvern
- W41 Manticore
- W42 War Mammoth
- W43 Orc Catapult
- W44 Dart Thrower
- W45 Vampires
- W46 Thieves
- W47 Maidens
- W48 Townspeople
- W49 Townspeople
- W50 Skeleton Command Group
- W51 Skeleton Warriors
- W52 Werebear, Bugbear & Owlbear
- W53 Scavengers
- W54 Giant Rats
- W55 Giant Cave Spider
- W56 Giant (Purple) Worm
- W57 Giant (Purple) Worm, Expansion Kit
- W58 Carrion Creepers
- W59 Rust, Cube & Ooze Monsters
- W60 Dungeon Beginners Set
- (WS) Double-Blister Diorama Sets
- WS1 Treasure Vault
- WS2 The Temple
- WS3 The Guard Room & Armory
- WS4 The Royal Court
- WS5 The Drunken Dragon Inn
- (SS) Special Sets
- SS01 Treasure
- SS02 Magical Items
- SS03 Weapons
- SS04 Dungeon Items
- SS05 Torture Chamber
- SS06 Sorcerer's Room
- SS07 The Temple
- SS08 Treasure Vault
- SS09 The Guard Room
- SS10 Sorcerer's Chariot
- SS11 Throne Room
- SS12 Drunken Dragon Inn
- (BB) Battling Behemoths
- BB1 Giant Dragon
- BB2 Giant Griffin
- (SP) Specials
- Other Specials
- References
Single Figures - pre bagged codes

W-1
Hobbit w/sword
W-2
Hobbit w/bow
W-3
Hobbit w/javelin
W-4
Hobbit w/torch
W-5
Dwarf w/sword- G-waw-wsingle06.jpg
W-6
Dwarf w/hammer 
W-7
Dwarf w/axe
W-8
Dwarf w/spear
W-9
Dwarf w/bow
W-10
Elf w/spear
W-11
Elf w/bow
W-12
Elf w/sword
W-13
Fighting man w/bow
W-14
Fighting man w/spider helm
W-15
Fighting man w/dragon helm
W-16
Fighting man w/serpent shield
W-17
Fighting man w/spear
W-18
Fighting man w/axe
W-19
Specialist, Ranger
W-20
Specialist, Thief- G-waw-wsingle21.jpg
W-21
Specialist, Assassin 
W-22
Specialist, Bard
W-23
Specialist, Monk
W-24
Specialist, Wizard
W-25
Specialist, Sorceror
W-26
Specialist, Magician
W-27
Specialist, Priest- G-waw-wsingle28.jpg
W-28
Orc w/sword - G-waw-wsingle29.jpg
W-29
Orc w/bow - G-waw-wsingle30.jpg
W-30
Orc w/axe - G-waw-wsingle31.jpg
W-31
Orc w/spear 
W-32
Orc w/standard
W-33
Goblin w/axe
W-34
Goblin w/sword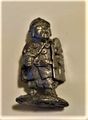
W-35
Goblin w/spear
W-35
Goblin w/spear (variant)- G-waw-wsingle36.jpg
W-36
Hobgoblin/Knoll
w/sword 
W-37
Hobgoblin/Knoll
w/spear
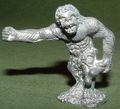
W-38
Troll
W-39
Ghoul
W-40
Mummy- G-waw-wsingle41.jpg
W-41
Zombie - G-waw-wsingle42.jpg
W-42
Skeleton 
W-43
Gargoyle
W-44
Dryad
W-45
Wererat- G-waw-wsingle46.jpg
W-46
Gnome w/sword 
W-47
Gnome w/axe
W-48
Gnome w/spear
W-49
Ogre
W-50
Medusae
W-51
Giant- G-waw-wsingle52.jpg
W-52
Giant snake - G-waw-wsingle53.jpg
W-53
Ent - G-waw-wsingle54.jpg
W-54
Yellow mold - G-waw-wsingle55.jpg
W-55
Green slime 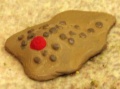
W-56
Ochre jelly
W-57
Black pudding
W-58
Gray ooze
W-59
Wyverin- G-waw-wsingle60.jpg
W-60
Dragon 
W-61
Gorgon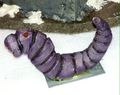
W-62
Purple worm
W-63
Manticora- G-waw-wsingle64.jpg
W-64
Hydra 
W-65a
Wraith/wight
(Version 1)
W-65
Wraith/wight
(Version 2)
W-66
Minotaur
W-67
Fire being w/whip- G-waw-wsingle68.jpg
W-68
Werewolf 
W-69
Kobold
W-70
Kobold w/sword
W-71
Elf w/crossow
W-72
Fighting man w/crossbow
W-73
Fighting man w/blowing horn- G-waw-wsingle74.jpg
W-74
Berserker w/Battleaxe - G-waw-wsingle75.jpg
W-75
Berserker w/sword 
W-76
Chaotic Warrior- G-waw-wsingle77.jpg
W-77
Dungeon Duke - G-waw-wsingle78.jpg
W-78
Dwarf King 
W-79
Fighting man standardbearer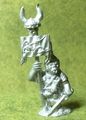
W-80
Goblin Standardbearer
W-81
Sorceror w/hand and horn
W-82
Sorceror w/familiar- G-waw-wsingle83.jpg
W-83
Mounted Fightingman w. spear 
W-84
Mounted Fightingman w. swordUnconfirmed- G-waw-wsingle85.jpg
W-85
Mounted Fightingman w. bow 
W-86
Mounted Elf w/bow
W-87
Mounted Dwarf
W-88
Mounted Hobbit
W-89a (v1)
Mounted Wraith
W-89 (v2)
Mounted Wraith- G-waw-wsingle90.jpg
W-90
Harpie - G-waw-wsingle91.jpg
W-91
Catapult w/ORC - G-waw-wsingle92.jpg
W-92
Catapult w/man - G-waw-wsingle93.jpg
W-93
Dart thrower w/ORC - G-waw-wsingle94.jpg
W-94
Dart thrower w/man 
W-95
Battering ram
W-96
War Mammoth w/driver
(hobgoblin or man)
& fighting castle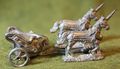
W-97
Chariot of the Necromancer- G-waw-wsingle98.jpg
W-98
Small Dragon


Blister Packs
W01 Halflings

W01
Halflings

W02 Mountain Dwarves - Swords & Hammers
- G-waw-w02a.jpg
W02a
Mountain Dwarves - Swords & Hammers
w.Swords 
W02b
Mountain Dwarves - Swords & Hammers
w.Hammers

W03 Mountain Dwarves - Axes & Bows
- G-waw-w03.jpg
W03
Mountain Dwarves - Axes & Bows
W04 Elves of the Forest - Swords & Bows

W04a
Elves of the Forest - Swords & Bows, w. Swords
W04b
Elves of the Forest - Swords & Bows, w. Bows


W05 Elves of the Forest - Spears

W05
Elves of the Forest - Spears
W05
Elves of the Forest - Spears
W05b
Elves of the Forest - Spears
W05


W06 Gnomes of the Rune Shield

W06
Gnomes of the Rune Shield
(blister)
W06a
Gnome of the Rune Shield 1
W06b
Gnome of the Rune Shield 2
W06c
Gnome of the Rune Shield 3


W07 Great Wood Treeman

W07
Great Wood Treeman (1)
W07
Great Wood Treeman (2)
W07
Great Wood Treeman (3)


W08 Good Men of the West - Bows

W08
Good Men of the West - Bows
(blister)
W08 (a)
Good Men of the West w. Bows- G-waw-w08b-01.jpg
W08 (b)
Good Men of the West w. Bows


W09 Good Men of the West - Swords

W09
Good Men of the West - Swords (blister)
W09
Good Men of the West w. Swords
W09
Good Men of the West w. Swords
W09
Good Men of the West w. Swords


W10 Good Men of the West - Spears & Axes

W10
Good Men of the West - Spears & Axes (blister)
W10a
Good Men of the West w. Spears
W10bb
Good Men of the West w. Axes
W10bc
Good Men of the West w. Axes
W10b
Good Men of the West w. Axes


W11 Female Characters

W11
Female Characters
(blister)
W11a
Female Characters
Fighter with Sword
W11b
Female Characters
Fighter with Spear
W11c
Female Characters
Ranger
W11d
Female Characters
Sorceress (x2 in Pack)
W11e
Female Characters
Thief


W12 Northern Barbarians

W12
Northern Barbarians

W13 Sorcerers

W13
Sorcerers
(blister)
W13
Sorcerers
(group)
W13 (a)
Sorcerer Reading Scroll
W13 (b)
Sorcerer w. Sword & Shield
W13 (c)
Sorcerer Conjuring Snake
W13 (d)
Sorcerer Holding Staff
W13 (e)
Sorcerer Holding Crystal Ball
W13 (f)
Sorcerer with Skull Staff


- All of these became part of AD&D 2001
- Note: the image we have for W13 (f) is in the blister but does not match the back right figure in the group shot.
W14 Specialists

W14
Specialists
(blister)
W14a
Specialist
Thief
W14b
Specialist
Assassin
W14c
Specialist
Bard
W14d
Specialist
Cleric
W14d
Specialist
Cleric version 2
W14e
Specialist
Ranger
W14f
Specialist
Paladin


W15 Orcs of the Eye - Swords & Axes

W15
Orcs of the Eye - Swords & Axes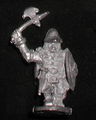
W15a
Orc of the Eye 1
W15b
Orc of the Eye 2- G-waw-w15c.jpg
W15c
Orc of the Eye 3


W16 Orcs of the Eye - Bows & Spears
- G-waw-w16.jpg
W16
Orcs of the Eye - Bows & Spears 
W16a
Orcs of the Eye 4
W16b
Orcs of the Eye 5- G-waw-w16c.jpg
W16c
Orcs of the Eye 6


W17 Orcs of the Hand - Axes & Swords

W17
Orcs of the Hand - Axes & Swords
W17a
Orc of the Hand 1
W17b
Orc of the Hand 2
W17c
Orc of the Hand 3


W18 Orcs of the Hand - Bows & Polearms

W18
Orcs of the Hand - Bows & Polearms
W18a
Orc of the Hand 4
W18b
Orc of the Hand 5- G-waw-w18c.jpg
W18c
Orc of the Hand 6


W19 Goblins of the Mount - Swords

W19
Goblins of the Mount - Swords
(blister)
W19a
Goblin of the Mount 1 w. Sword


- All the models in the blister appear to be the same.
W20 Goblins of the Mount - Axes & Spears

W20
Goblins of the Mount - Axes & Spears
(blister)
W20 (a)
Goblin of the Mount w. Axe
W20 (b)
Goblin of the Mount w. Spear


W21 Goblin Wolf Riders
- G-waw-w21.jpg
W21
Blister 
W21
Goblin Wolf Riders

W22 Kobolds

W22
Kobolds (2 sculpts ×3)
W22a
Kobold 1
W22b
Kobold 2


W23 Wood Trolls & Cave Trolls
W23
Wood Trolls & Cave Trolls (5, of 2 types)
W23a
Wood Troll
W23b
Cave Troll


W24 Mordor Command Pack
- G-waw-w24.jpg
W24
Mordor Command Pack
W25 Chaotic Warriors of the East
- G-waw-w25blister.jpg
W25
Chaotic Warriors of the East 
W25a
Chaotic Berserker 1
W25b
Chaotic Berserker 2


W26 Berserkers

W26
Berserkers

W27 Mounted Dark Riders
W27
Mounted Dark Riders
W28 Fire Demon & Wraiths

W28
Fire Demon & Wraiths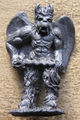
W28
Fire Demon- G-waw-w28b.jpg
W28
Wraith


W29 Slimes, Molds & Jellies

W29
Blister
W29a
Slimes, Molds & Jellies
W29b
Slimes, Molds & Jellies
W29c
Slimes, Molds & Jellies
W29d
Slimes, Molds & Jellies


W30 Werewolves & Wererats

W30a
Werewolves & Wererats - Wererats
W30b
Werewolves & Wererats - Werewolves


W31 Undead (Ghoul, Mummy, Wraith, Vampire, Skeleton)

W31
Undead (Ghoul, Mummy, Wraith, Vampire, Skeleton)- G-waw-w31-2c.jpg
W31c
Wraith - G-waw-w31-2d.jpg
W31d
Vampire - G-waw-w31-2e.jpg
W31e
Skeleton 
W31
Mummies & Ghouls
W31a
Ghoul
W31a-variant
Ghoul variant
W31b
Mummy


W32 Elementals

W32a
(AD&D 5002q)
Elementals: Air
W32b
Elementals: Earth
W32c
WW02
Elementals: Fire
W32d
Elementals: Water


W33 Ogre & Giant
W33a
Ogre
W33b
Giant
W37
Giant
(bulletin)


W34 Minotaurs & Medusas
- G-waw-w34.jpg
W34
Minotaurs & Medusas
(blister) 
W34a
Minotaur
W34b
Medusa


W35 Zombies, Skeletons & Gargoyles

W35
Zombies, Skeletons & Gargoyles
(blister)
W35a
Zombie
W35b
Skeleton
W35c
Gargoyle (2-pce w. separate wings)
(also in WW02)


W36 Purple Worms & Giant Snakes

W36
Purple Worms & Giant Snakes
W36a
Large Worm
W36b
Giant Cobra (2-pce fig)
W36c
Large Worm
W36d
Giant Snake


W37 5-headed Hydra

W37
5-headed Hydra
(assembled)
W37
5-headed Hydra
(blister)
W37
5-headed Hydra
(catalog)
W37 (a)
Hydra Body
W37 (b)
Hydra 3-Heads
W37 (c)
Hydra 2-Heads


W38 Serpentine Dragon

W38 (A v1)
Red Dragon
W38 (A v2)
Red Dragon
(blister)
W38 (A v2)
Red Dragon
W38
Serpentine Dragon
(catalog)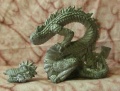
W38 (B v1)
Serpentine Dragon
W38 (B v2)
Serpentine Dragon


- aka: Red Dragon but version 2 was referred to as a Serpentine Dragon in 1982.[2]
- Proof is required that W38 (B) was marketed as this. It later appears in 8004.
W39 Rearing Dragon

W39
Blue Dragon
W39
Rearing Dragon v.2


W40 Wyvern

W40 (v1)
Wyvern
(blister)
W40 (v1)
Wyvern
W40 (v2)
Wyvern


W41 Manticore

W41
Manticore

W42 War Mammoth

W42
Large Monster War Mammoth
(blister)
W42
War Mammoth
(assembled)- G-waw-w42e.jpg
W42 (a)
Driver


W43 Orc Catapult
W43
Orc Catapult- G-waw-w43a-01.jpg
W43 (a)
Catapult 
W43 (b)
Crew w. Boulder


W44 Dart Thrower

W44
W44
Dart Thrower
(blister)- G-waw-w44a.jpg
W44 (a)
Dart Thrower 
W44 (b)
Crew w. Darts 1
W44 (c)
Crew w. Darts 2


W45 Vampires

W45
Vampires
(blister)
W45
Vampire


W46 Thieves

W46
Version 1 Blister
W46
Version 1 Female Thief
W46
Version 2 Blister


W47 Maidens

W47
Maidens
(blister)
W47 (a)
Maiden
W47 (b)
Maiden
W47 (c)
Maiden
Unknown
Maiden / Barbarian
(v. similar to W47a)


- These are unverified: we really need to see a blister pack of them.
W48 Townspeople
- G-waw-w48.jpg
W48
Townspeople
W49 Townspeople

W49
Townspeople
(blister, 6 of 5 types)- G-waw-w49a.jpg
W49a
Civilian 1 
W49b
Civilian 2
W49c
Civilian 3
(x2 per blister)
W49d
Civilian 4- G-waw-w49e.jpg
W49e
Civilian 5


W50 Skeleton Command Group

W50
Skeleton Command Group- G-waw-w50a.jpg
W50 (a)
Skeleton Standard - G-waw-w50b.jpg
W50 (b)
Skeleton Command

- The 2 figures in this set are very similar to WW08 (2 & 3), but possibly they had undecorated shields in this earlier release?
W51 Skeleton Warriors
W51
Skeleton Warriors
W52 Werebear, Bugbear & Owlbear

W52
Werebear, Bugbear & Owlbear
(group)
W52 (a)
Werebear
W52 (b)
Bugbear
W52 (c)
Owlbear


W53 Scavengers
- G-waw-w53-x.jpg
W53
Scavengers (4 types) 
W53a
Giant Tick
W53a
Giant Tick
W53a-2
Giant Tick variant?
W53b
Centipede
W53c
Giant Rat
W53d
Carrion Creeper
W53
Giant Ticks & Centipedes (2 sculpts ×2)


W54 Giant Rats

W54
Giant Rats
(blister)
W54
Giant Rat


W55 Giant Cave Spider

W55
Giant Cave Spider
(3-piece figure)

W56 Giant (Purple) Worm

W56
Giant (Purple) Worm
(4-piece figure)
W56a
Giant (Purple) Worm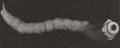
W56 & W57
Bulletin Scan


W57 Giant (Purple) Worm, Expansion Kit

W57
Blister
W57
Giant (Purple) Worm, Expansion Kit
Midsection (x3)


W58 Carrion Creepers

W58
Carrion Creepers

W59 Rust, Cube & Ooze Monsters

W59
Rust, Cube & Ooze Monsters
(blister)
W59 (a)
Rust Monster
W59 (b)
Cube Monster
W59 (c)
Ooze Monster


W60 Dungeon Beginners Set

W60
Dungeon Beginners Set
(8 gaming figures for beginning gamers)
W60a
Dungeon Beginners Set


Double Blister Diorama Sets
WS1
Treasure Vault,
(assorted booty in piles, stacks, bags, etc.)- G-waw-WS2.jpg
WS2
The Temple,
(assorted statues, braziers, attendants and items) - G-waw-WS3.jpg
WS3
The Guard Room & Armory,
(weapons rack, forging equipment, beds, table, etc.) - G-waw-WS4.jpg
WS4
The Royal Court,
(throne w. interchangeable head for seated figure, attendants, ornate furniture, etc.) - G-waw-WS5.jpg
WS5
The Drunken Dragon Inn,
(bar, furniture, casks, bartender & waitress, etc.)

- These are probably all early versions of the later Special Sets. Comparing, for example, the two "Tresure Vaults" (WS1 vs SS-08) it seems that SS-08 was substantially the same as WS1 with a few differences - the "skeletal remains" from WS1 is not listed in the Judges Guild catalog for SS-08 Treasure Vault, but instead it was resculpted for the SS-04 Dungeon Items set as "Dead Warriors". Unless sealed packs turn up and are opened we can't be 100% certain.
Special Sets
SS01 Treasure
- G-waw-Set1.jpg
SS01 Treasure
(Blister Pack) 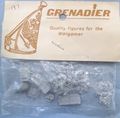
SS01 Treasure
Earlier packaging as #137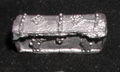
SS01a Treasure
Large Treasure Chest
SS01b Treasure
Small Jewel Chest
SS01c Treasure
Pot of Gems- G-waw-Set1d.jpg
SS01d Treasure
Mound of coins (x2) 
SS01e Treasure
Large Mound of Coins, Gems & a Pile of Gems- G-waw-Set1f.jpg
SS01f Treasure
Jewelery 
SS01g Treasure
Coins & Treasure
SS01h Treasure
Sack of Coins (x2)


SS02 Magical Items

SS02 Magical Items
(Blister Pack)
SS02
Earlier packaging as #138- G-waw-Set2a.jpg
SS02a
Potion Bottle (x4) - G-waw-Set2b.jpg
SS02b
Scroll (x4) - G-waw-Set2c.jpg
SS02c
Skull (x2) - G-waw-Set2d.jpg
SS02d
Wand - G-waw-Set2e.jpg
SS02e
Staff - G-waw-Set2f.jpg
SS02f
Barrel - G-waw-Set2g.jpg
SS02g
Crystal Ball - G-waw-Set2h.jpg
SS02h
Scarab 
SS02i
Brazier- G-waw-Set2j.jpg
SS02j
Boots - G-waw-Set2k.jpg
SS02k
Efreet Bottle (x2) - G-waw-Set2l.jpg
SS02l
Spellbook (x2)


SS03 Weapons
- G-waw-Set3.jpg
SS03 Weapons
(Blister Pack) - G-waw-Set3a.jpg
SS03a
Round Shield - G-waw-Set3b.jpg
SS03b
Goblin Shield - G-waw-Set3c.jpg
SS03c
Elf Shield - G-waw-Set3d.jpg
SS03d
Man Shield - G-waw-Set3e.jpg
SS03e
Orc Shield - G-waw-Set3f.jpg
SS03f
Helmet (x2) - G-waw-Set3g.jpg
SS03g
Suit of Chainmail - G-waw-Set3h.jpg
SS03h
Sword (x2) - G-waw-Set3i.jpg
SS03i
Crossbow (x2) - G-waw-Set3j.jpg
SS03j
Hammer - G-waw-Set3k.jpg
SS03k
Axe - G-waw-Set3l.jpg
SS03l
Battle Axe - G-waw-Set3m.jpg
SS03m
Spear - G-waw-Set3n.jpg
SS03n
Mace
SS04 Dungeon Items
- G-waw-Set4.jpg
SS04 Dungeon Items
(Blister Pack) 
SS04a
Talking Door
SS04b
Rune Throne
SS04c
Crypt
SS04d
Dead Warriors
SS04e
Stone Chair & Table
SS04f
Idol
SS04g
Stone Urn (x2)
SS04h
Small Altar
SS04i
Trap Door
SS04j
Wall Torch (x2)


SS05 Torture Chamber
SS05 Torture Chamber
(Blister Pack)
SS05 (a)
Hooded Executioner
SS05 (b)
Torturer with Hot Iron
SS05 (c)
The Rack and the Victim
SS05 (d)
The Iron Maiden
SS05 (e)
Table with Torture Devices
SS05 (f)
Brazier with Hot Irons
SS05 (g)
The Stocks
SS05 (h)
Torture Table
SS05 (i)
Chained Prisoner (?)


SS06 Sorcerer's Room

SS06
Sorcerer's Room
(Blister Pack)
SS06
(Advert)
SS06
Sorcerer's Room
(parts)
SS06a
Table w. Spellbook, Scroll & Candle on Skull- G-waw-Set6b.jpg
SS06b
Lizard & Amulet 
SS06c
Shelves w. Books & Bottles- G-waw-Set6d.jpg
SS06d
Skull & Snake 
SS06e
Sorcerer- G-waw-Set6f.jpg
SS06f
Stone Urn 
SS06g
Barrel
SS06h
Jug
SS06i
Efreet Bottle- G-waw-Set6j.jpg
SS06j
Sack 
SS06k
Chest
SS06l
Boiling cauldron


SS07 The Temple
- G-waw-Set7.jpg
SS07
The Temple
(Blister Pack) 
SS07 The Temple
(Advert)
SS07 (a)
Altar with Sacrificial Victim
SS07 (b)
Large Stone statue
SS07 (c)
High priest holding up heart & knife
SS07 (d)
Lesser Priest (x2)
SS07 (e)
Statue (x2)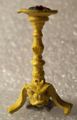
SS07 (f)
Temple Brazier (x2)


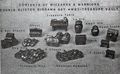
SS08 Treasure Vault

SS08
Treasure Vault
(Blister Pack)
SS08
Treasure Vault
(advert)
SS08
Treasure Vault
(contents)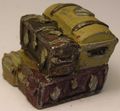
SS08a
Stack of Large Chests
SS08b
Pile of Gold Bars (x2)
SS08c
Pot of Gems (x2)
SS08d
Urn of Coins & Gems (x2)
SS08e
Open Chest of Coins
SS08f
Stack of Bags of Coins
SS08g
Pile of various Treasure Items
SS08h
Counting Table with Treasure
SS08i
Stool with scribe


SS09 The Guard Room

SS09
The Guard Room
(blister)
SS09 (a)
Bunk Bed with
Hanging Weapons (x2)
SS09 (b)
Stack of Weapons
SS09 (c)
Table with mugs,
food, lantern & bottle
SS09 (d)
Stool (x2)
SS09 (e)
Chest
SS09 (f)
Barrel
SS09 (g)
Cauldron


SS10
Sorcerer's Chariot
- G-waw-Set10-01.jpg
SS10
Sorcerer's Chariot
(assembled) 
SS10
Sorcerer's Chariot
(parts)
SS10 (a)
Sorcerer
SS10 (b)
Unicorn (x2)
SS10 (c)
Chariot Haft
SS10 (d)
Chariot Left Side
SS10 (e)
Chariot Right Side
SS10 (f)
Chariot Base
SS10 (g)
Wheels (x2)


SS11 Throne Room
- G-waw-Set11.jpg
SS11
Throne Room
(blister) 
SS11
Throne Room
(contents)
SS11 (a)
Overlord on Throne
SS11 (b)
Separate Heads for Overlord (x3)
SS11 (c)
Braziers (x4)
SS11 (d)
Large Lion Statues (x2)
SS11 (e)
Plush Divan
(Couch)
SS11 (f)
Feasting Table
SS11 (g)
Fanbearer (x2)
SS11 (h)
Queen
SS11 (i)
Queen's Leopard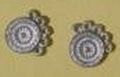
SS11 (j)
Plush Cushions (x4)
(cf Dragontooth Elves)


SS12 Drunken Dragon Inn

SS12
Drunken Dragon Inn
(Blister Pack)
SS12a
Bar
SS12b
Innkeeper
SS12c
Serving Wench
SS12d
Wine Rack
SS12e
Large Wine Barrel- G-waw-Set12f.jpg
SS12f
Table (x2) 
SS12g
Stool (x4)
SS12h
Bench
SS12i
Barrel (x3)


Battling Behemoths
- No product codes were used with these and only 24 of each are thought to exist.
BB1 Giant Dragon

(BB1)
Giant Dragon
(box)
(BB1)
Giant Dragon
(Special #1)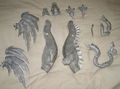
(BB1)
Giant Dragon
(parts)
(BB1)
Head
(BB1)
Body Left
(BB1)
Body Right
(BB1)
Wings
(BB1)
Tail
(BB1)
Arms
(BB1)
Feet


- Marked "GRENADIER ©1977"
BB2 Giant Griffin

(BB2)
Giant Griffin
(box)
(BB2)
Giant Griffin
(Special #2)
(BB2)
Giant Griffin
parts
(BB2)
Body Right
(BB2)
Body Left
(BB2)
Wings
(BB2)
Head
(BB2)
Arms


Other Specials
- G-waw-SP1.jpg
SP1
½-inch, 6-sided dice (white w. black pips) - G-waw-SP2.jpg
SP2
Treasure Gems
(2 large gems, 20 small gems)
(cf 5009 Dragon’s Lair) - G-waw-SP3.jpg
SP3
Gold Plated Basilisk
(Grenadier Bulletin #1) - G-waw-SP4.jpg
SP4
Gold Plated Dragon Pendant
(Xmas Dragon)
References
- [1] T. Gunn, (2016) The Fantastic Worlds of Grenadier (2nd ed.), pages: 13-18,127-128
- [2] Grenadier (1982) The Greandier Bulletin #4, pages: 3